For the best sound, always keep your slate, glass, and crystal friction calls conditioned. Slate calls can be conditioned with Scotch Brite pads that can be found at most stores like Walmart or Home Depot. Simply run the Scotch Brite pad back and forth over the call’s surface. Scotch Brite can also be used to clean the tips of your striker – you really don’t want to use sandpaper! Sandpaper can change the shape of the striker’s tip. For glass and crystal calls, I recommend using a conditioning stone like David does in this video, but you can also use drywall sandpaper.
Monthly Archives: June 2012
Scratch Box Turkey Call Tips with Beard Hunter Calls
One of my favorite call makers to visit at events is Russell Beard from Beard Hunter Calls. He make some fine calls! In this video, Russell shows us how to run his scratch box turkey call. The call is easy to use and as you can see in the video, it makes some really nice clucks, purrs and yelps.

How to Skin, Prepare, and Display a Turkey Cape Mount
Caping out a turkey and preparing it for display is simple to do and takes very little time. It makes a great display and there’s virtually no cost or kits to order, no plaques to make and no taxidermist bill to pay.
Once you’ve done one it takes no more than 10 minutes to cape a turkey out in the field and prepare it for transport. It takes about the same amount of time to prepare, stretch, and tack it down on a board, and borax the bird once the season is over and you pull it out of the freezer.
This “How to Cape a Turkey” write up along with the video that GSN has provided will make it easier for those who want to cape their birds.
Caping your turkey in the field
- Handle the bird carefully once you’ve harvested him. Be careful not to damage feathers or the fan when carrying him back to camp. The better shape he’s in – the better cape you’ll have.
- For easier caping clip the wings off.
- Hang the bird by his head and neck. This can be done from limbs or even the side rail of your truck. (Note: This entire process is easier if there’s someone to hold the bird still while you cape. I’ve done numerous ones alone but not trying to cape a pinwheel helps.)
- You will notice a distinguishable parting of feathers starting at the neck and extending down the side of the bird all the way to his fan. It’s similar to a human hair / part line. The key is to follow this line when cutting the cape off the bird. This is narrow on the neck and gets progressively wider as you get closer to the wing.
Make your first cut on the back of the bird’s neck where the feathers meet the hairless skin near the head and begin to follow the part line down the bird. Cut a few inches on each side to get started. Be careful to not pull feathers loose and as soon as the skin is exposed grip this instead to the outer part of the cape. This avoids pulling feathers loose that could affect the look of the finished cape. Once you get away from the head, slip your fingers tips in behind the skin and pull while you cut and follow the line. If in doubt where the line is go wider towards the clipped wing bone area. I usually make this cut all the way down to the bird’s leg and then do the same on the opposite side.
- After the side cuts are complete, grip the cape from the inside and begin to pull and trim the cape away from the bird. Often the skin will separate similar to skinning a deer but be careful to not over do it. As you approach the mid back region the skin is very thin and you have to be careful not to cut thru the skin. You’ll understand this better once you’ve done one. Don’t worry if you have a couple “cut throughs” as it will likely not show up from the outside of the cape. After clearing the mid back the cape will pull loose for a couple inches and then you’ll have to trim again.
- Once you trim the cape down to the fan area, finish the cuts on each side near the legs so that the entire cape is below the section at the fan. You’ll be able to grip the same place that you would normally just cut the fan loose and cut it free. The fan and cape should be in one piece and the caping is now complete.
- To prepare for transport simply place a paper towel or toilet paper along the area against the exposed skin and fold it over. Place it in a bag and its ready for the freezer. If traveling its good to have an oversized “carry on” bag that you can pack the cape in. I have packed as many as 6 capes in a piece of luggage. If you’re on a travel hunt and a freezer isn’t available, spread the cape and borax it until its time to pack up and travel. (A word of advice here is that if you do borax the bird, try and finish the caping process sooner rather than later once you are home. I have had birds began to cure out while still in the freezer making it difficult to prepare and stretch compared to a bird that was not boraxed.)
The field aspect is now completed and once back home simply place it in the freezer until the season is over and you have time to finish the process.
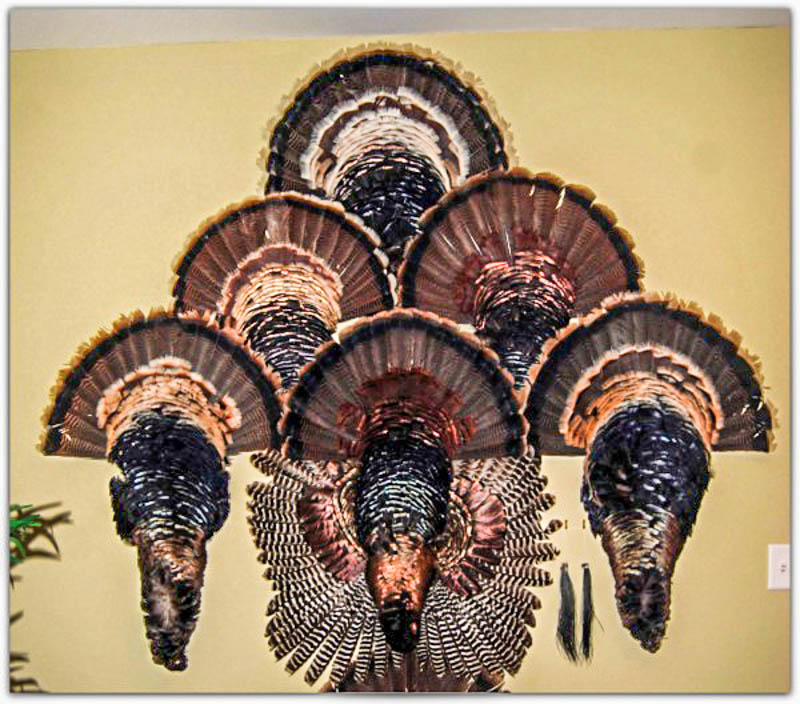
Turkey capes can be made into arrangements to maximize space
Preparing the Cape for Curing at Home
Tools Needed: Small snips or shears, knife, scissors, hammer, 4 d nails, 6 d nails, board or plywood strips, borax (Mule Team 20 20 can be found in most grocery stores)
- Remove the bird from the freezer and allow to thaw. I lay mine out in the truck bed or driveway and within a couple hours they will unfold and I can begin the finishing process.
- Flip the cape with feathers down and grasp group of feathers behind the main fan quills. Cut away with scissors. Press down on fan and hold knife flat and trim away meat where the main quills come together. Cut all meat away until all you see is the yellow near the quill tips. This is easy once you’ve done one and it can be done in one cut with experience. Cut both sides away and you’ll feel a small section of bone that protrudes up off quills. Use your snips and clip this away. Again press flat to quills and be careful where you cut.
- Often when you cape you’ll have a couple secondary skin and feather sections that need to be cut away. Theses can be left but I prefer to get rid of them for the shape I like. By carefully holding them above the main cape you can clip these off with scissors. Now check the cape itself and careful cut away any meat that may be on the cape from the original field caping. Now the cape is ready to be stretched and prepared for curing.
- Lay the cape on a board, strip of plywood, or sheet of plywood. (Its possible that heavy cardboard can be used as well but I like the stiffness wood provides.) Drive a 6 d nail through the middle of the fan where the quills come together (same area you cut the meat away and clipped the bone). Grasp the top of the neck section of the cape and pull tight and drive another 6 d nail to keep it in place.
- Drive 3 sets of 4 d nails to open and stretch the cape itself beginning near the fan and working your way to the neck area. You won’t stretch to the point of putting pressure on the cape but just firmly open it up and tack it down. 3 sets spread out should be adequate to help the cape take the proper shape. (Note: Don’t over drive nails. Tack just enough to hold so that they’re easy to remove later)
- Open the fan up so that’s it’s in alignment with the cape and adjust the fan to run straight across. It will permanently take the shape you give it so if it’s not all the way open or open too much that’s what you’ll end up with. Again, sight it so the base is straight across and tack a 4 d nail near the center quill area to hold in place. Adjust the feathers so that no openings between feathers are visible. Tack enough nails between feathers to be sure the spread will stay intact. I average using 6 nails to be safe.
- Pour borax to cover all exposed areas of the cape. Pour generously on the fan. Take the beard from the bird and “plug” it into the poured borax and it will cure along with the cape and it keeps the right beard with the right cape.
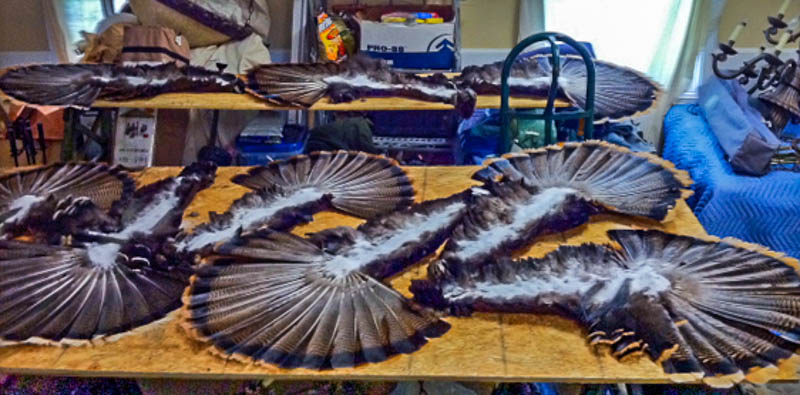
Caping a turkey for display Photo shows capes tacked down and curing
Store the cape in a safe area from children, pets, and weather. Let cure for 5 weeks and then simply remove by pulling nails with pliers. I dump most of the borax into a container and then carry outside and walk into the wind and tap with a bristle brush and lightly scape and brush the excess borax off. Be careful not to breathe it in and wearing a dust mask is advisable. I tap the cape from behind as well to clear as much as possible.
- To mount the cape is easy. Lay feathers up, grasp the fan and determine approximate center of fan where quills meet. Drive a 6 or 8 d nail through the cape until the nail comes out the skin side. Hold the cape on the wall and tap the nail until it’s mounted on the wall. Avoid studs as just the drywall penetration will hold..
This is all it takes to skin and prepare a cape for mounting. Although several steps are involved from a time standpoint it only takes 20 minutes a cape for the combined aspects once you’ve done a couple.
Hopefully this piece along with the 2 videos will be helpful for those that would like to cape their birds.
Bobby Parks
Grand Slam Network
Ol Tom Field Expert
Mossy Oak Pro Staff
How to Shoot a Turkey
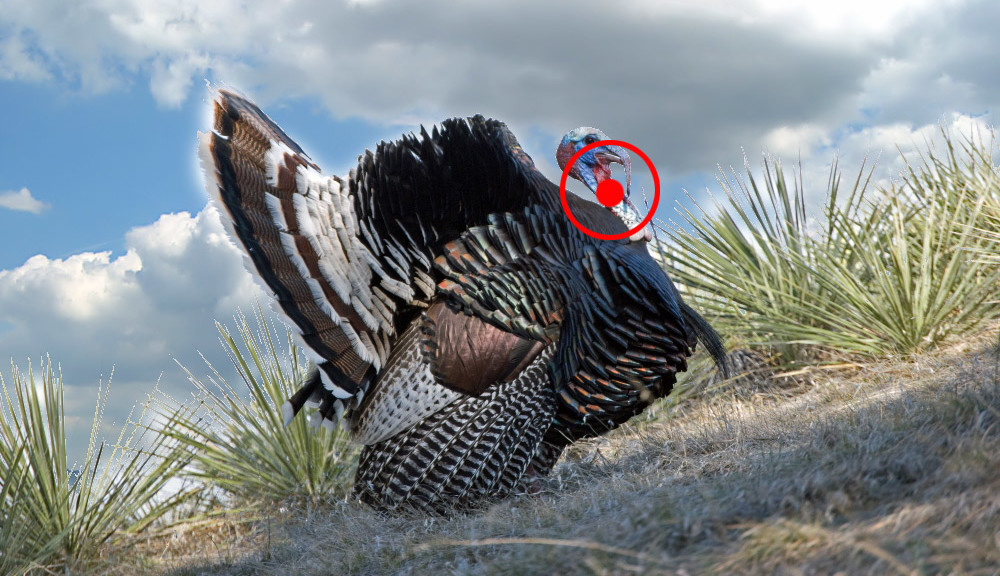
If you’re new to turkey hunting, you might be wondering how to shoot a turkey – and make it count! This article focuses on where to shoot a turkey with a shotgun. For the most part, when shooting a turkey with a shotgun, you’re going to aim at the head and/or neck.
Where to shoot the turkey
When turkey hunting with your shotgun, you want to aim at the turkey’s head or neck region. My favorite place to aim is where the waddles meet the feathers on the neck – and maybe a little up from there. Naturally, with the shotgun you will have the shot scattered in a circular pattern around the point you were aiming. If you’re aiming at then neck, your shot will hit the neck and head – and the result will be a clean humane kill.
How far can you shoot a turkey?
Pattern your gun. There’s no room for guess work after you’ve spent hundreds of dollars on camo, guns, and calls only to miss a bird. If that happens, you probably kick yourself the entire way home. Besides, heading out to the range with a few buddies and patterning guns is fun.
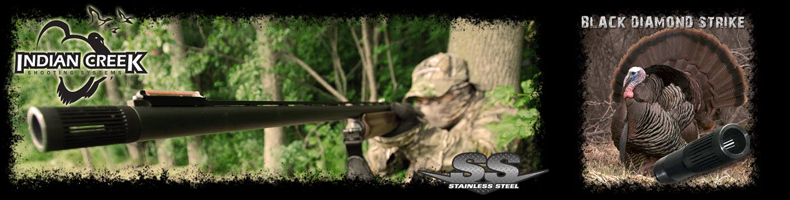
Anyway, in the next session, I’ll cover an easy way to pattern your turkey hunting shotgun. You need to be putting a minimum of 78 shot in a 10″ circle. Personally I like to have well over 100. My Remington 870 youth model 20 gauge with a 21″ barrel and an Indian Creek .555 choke shooting Hevi-Shot #7s shoots 120-140s consistently at 40 yards. When I back up to 50 yards, it backs me down to about 90 shot in a 10″ circle. So I consider my effective range with that combination to be 40 to 45 yards.
Before the shot
I’m not going to go in depth on patterning in this article, but before you hit the turkey woods, be sure to pattern your shotgun with the same gun/choke/shell combination you’ll be hunting with. Changing up one factor in the gun/choke/shell combination will result in a different pattern. Sometimes the change will be enough to cause a miss! To pattern your shotgun, follow these steps:
- Buy a brown paper roll from the Home Depot, which is typically found in the paint section. It cost less than $10 and is cheaper than some of the other alternatives
- Mark a dot on the paper to aim at. Using a range finder, step back to 30 yards, and shoot at the dot you marked on the paper. Be sure to write the yardage information and the shotgun shell info on the target.
- Find a piece of cardboard and cut a circle with a 10″ diameter. Locate the most dense pattern on the brown paper and draw your circle around it. Draw a crosshair on the circle to create four sections, and count the holes in each quadrant and total them up.
- Keep in mind, a 10″ circle has 78 square inches. So your target needs to have at least 78 shot in the circle to make 1 shot per square inch.
- Repeat the process with a new sheet of paper, backing up 5 to 10 yards each time until you’re no longer getting at least 78 shot per square inch.
- This should help you identify your effective range. Once you find it, shoot at that distance a few more times to make sure everything is consistent.

Make the shot count!
When you set up on the turkey, be aware of your surroundings. First and foremost, make sure you’ll be shooting in a safe direction! Also consider the following tips before the shot:
- When you setup, make sure you have room to move your gun around and that the barrel is unobstructed. After all, you never know which direction the turkey will choose to come in. If you do have to swing the gun around, you can either wait until the turkey walks behind a tree, or you can just wait until he gets close and SLOWLY move. He’ll see you, but if your movement is slow, he might pop his head up and start to walk away – giving you time to put a bead on him and squeeze the trigger! I prefer to move the gun when he passes behind a tree or bush.
- Make sure you’re not shooting into brush, it will throw off your shot.
- Don’t rush the shot. If you’re looking down the barrel at the bird, its easy to become unnerved and squeeze a round off too early. Wait for the clear shot within your effective range!
- If the bird is walking or strutting, cut with a mouth call. He should stop or come out of strut and lift his head up. When he does… bust him.
- If you shoot right handed, get setup in a direction with the barrel facing slightly right of where you think the turkey will come in. Its easier to swing and aim left than it is right if you’re a right handed shooter.
- Get comfortable. If you’re not comfortable where you’re sitting, you’re more likely to move around and get busted in the process.
- If the pattern on your setup is TIGHT, be sure to take your time especially when the bird is close! Its easy to miss a turkey that is up close!
Here’s my missed turkey from 2012 on a North Georgia public land turkey hunt! I never saw this limb until after the shot. The bird came in from behind.

After the shot
After the shot, you hope to see a dead bird bouncing around like he just ate a load full of #7 Hevi-Shot! Either way, get ready for a second shot. You might have missed or sometimes a bird will flop or lay still, and then get up and run off (happened to a couple of folks I know last year). Regardless, you want to be ready for a second shot if needed. I usually try to get to the bird quickly with the gun in hand. I carry my gun in case he takes off when I get close to him. When you get to him, be careful picking him up – he can spur you good! That’s why most people just step on their head until they quit flopping.
Finally, always remember to keep your gun on safety before and after the shot! Its easy to forget to place the gun on safety during the excitement of the harvest! Stay safe, shoot straight, and let us know how you do!
Thanks to all or our members who share tips on shooting and patterning your shotgun for turkey hunting!