Often times we have articles and other works submitted by our members here on the Turkey Hunting Forum. Gary Meinke, a GSN member submitted this Dead Turkey Observation and Examination quiz, which contains a great deal of interesting information that might just stump even the most seasoned turkey hunters among us!
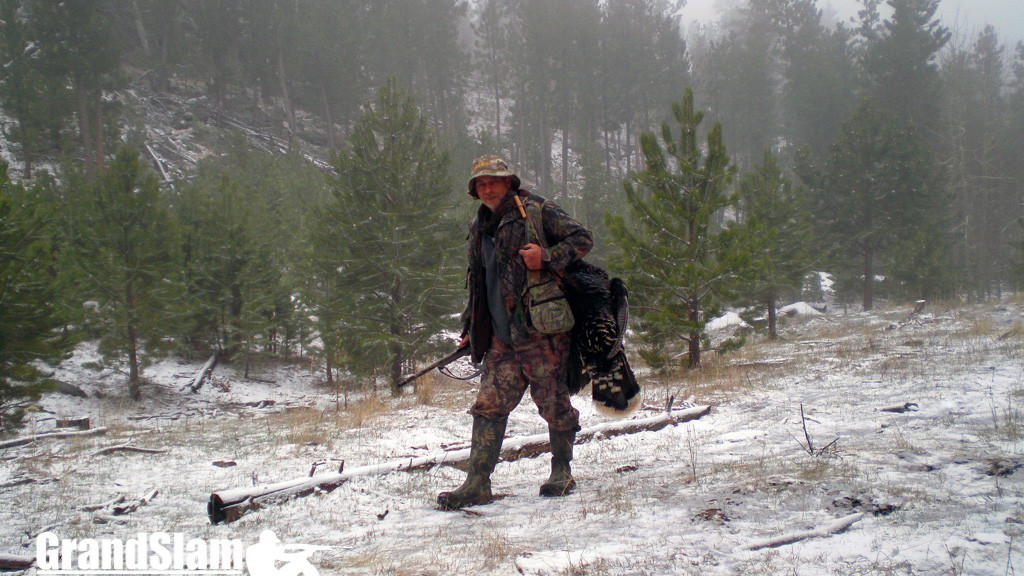
The wind was blowing the snow completely horizontal as my friend Les and I put on our hip boots. That April afternoon we were in the midst of a full fledged blizzard, getting ready to cross the river to set up near a turkey roost. I carried a Double Bull blind and my seat, Les had his gun and seat. As we started our mile long trek Les said “I bet we are the only dedicated turkey hunters on the river right now.” I said “Les…I don’t think dedicated is the best word to describe us.”
The roost was in an old river channel and we found the slight drop in elevation protected us from the wind. In the blind it was really quite pleasant as we watched big flakes of snow float softly to the ground. We called periodically, and a little before sunset I looked out my side of the blind. Just 25 feet away there was some movement at the top of some weeds that I couldn’t figure out. Finally I realized I was looking at the head and neck of a hen turkey. I didn’t recognize what I saw at first, because she was covered with a half inch of snow from the base of her neck to her tail. Her body just blended in with the white background. The hen fed around the blind for a while and eventually shook off all the snow that had accumulated on her. Les commented how cold, wet, and miserable she looked. The hen soon moved off and flew up to roost about 70 yards away. We managed to slip out of the area without flushing her. Les and I never saw or heard a gobbler that evening, but I will never forget that hunt. Hunting turkeys in the snow can produce some special memories.
I do most of my turkey hunting out west and spring snowstorms are not uncommon during the turkey season. I have experienced spring snows as late as the third week in May. Our spring snows usually come with a good dose of wind, and many fall into the blizzard category. It seems I hunt turkeys in the snow at least once every other spring, and two or three times in some of the more volatile springs. I have put together some observations on how a spring snow affects turkeys and hunting them. However, my experience with hunting turkeys in snow is limited to the Rio Grande and Merriam’s turkey. I have yet to hunt Easterns in the snow. If you are hunting out west for a Rio or Merriam’s and find yourself hunting in snow, then perhaps you may find some of the following information useful.
BEHAVIOR
Both Rios and Merriam’s tend to gather in pretty large flocks in the winter. In cold late springs these flocks don’t break up until just before the spring hunting season opens. An early spring snowstorm can delay flock break up. Once breakup occurs, a snowstorm may cause the birds to regroup into flocks of 10-25 birds. For Rios this means the flocks may be fewer and farther in between, but more birds in each flock. In the case of Merriam’s in the mountains, the birds may migrate vertically downhill in a spring snow after flocking back together. If you are hunting public lands, which are usually at higher elevations, the birds may just move to lower elevations which are usually private lands. Since these spring snows are not uncommon, some turkeys do take them in stride and stay up high. When hunting higher elevation public lands during a storm, I have managed to find a few birds still weathering the storm.
Turkeys may just choose to hole up in sheltered areas during the intense part of a storm. The birds are out there 24/7 and will have to feed and move about sooner or later. When a storm finally does break the toms are pretty anxious to get back to the task of breeding. If the snow quits and the wind dies down some gobblers may start sounding off even in the middle of the day. And if the temps are rising with some snow melting, things will be getting back to normal relatively quickly. However, if the snow is very deep (close to a foot or more) it may take several days for the turkeys to resume their normal routine.
Prolonged cold and several storms during the spring may delay nesting in hens for a week or more. This could affect how the breeding flock structure progresses later in the season. The hens may not be leaving the gobblers as readily to lay their eggs.
ADVANTAGES OF SNOW
There are really not many advantages of hunting in snow. The competition of other hunters certainly is reduced. About the only other hunters out there are ones that pre-planned a hunt for that particular time and ended up hunting in the snow by chance, or the few turkey hunting nuts, like me, that think its fun to chase gobblers in the snow. Local hunters normally just wait for the weather to improve.
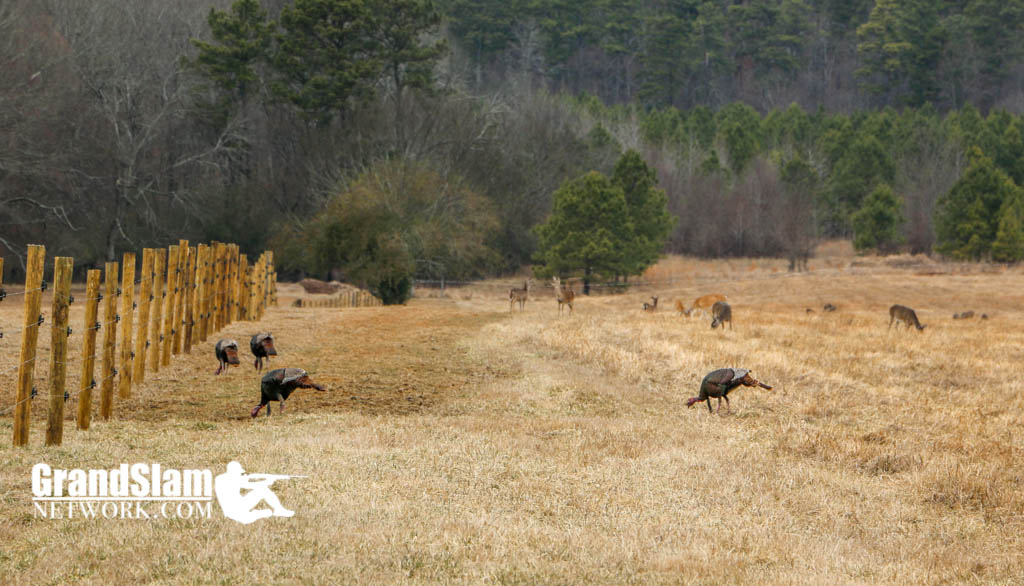
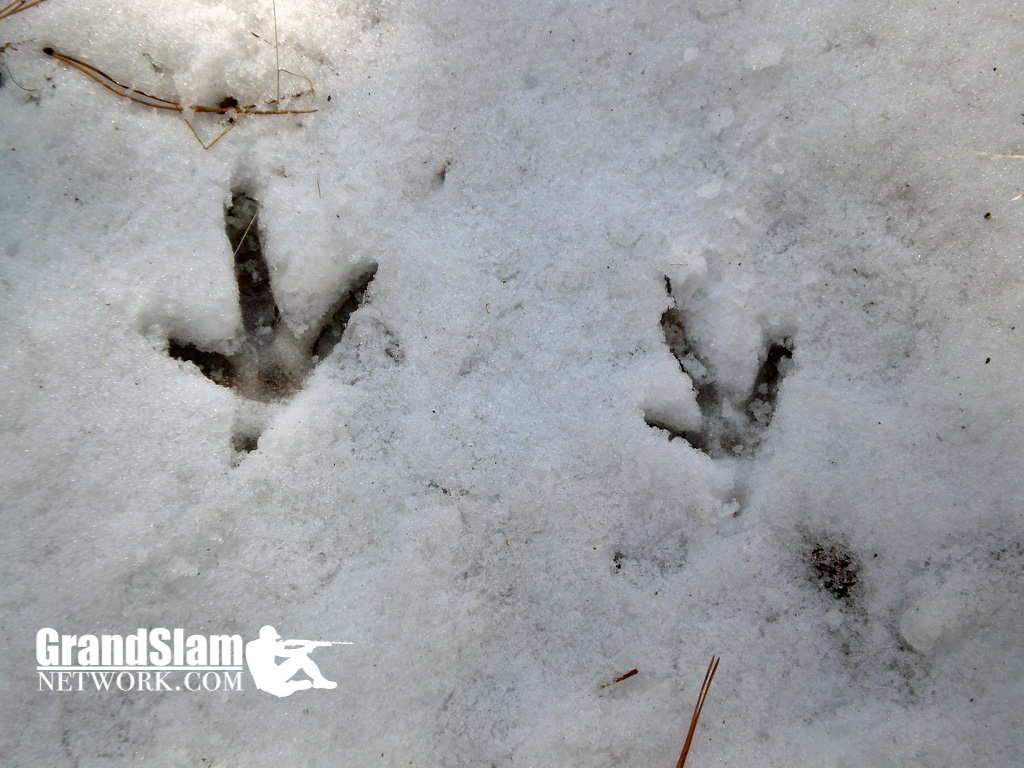
Here Tracks will certainly be more easily revealed wherever turkeys roam. In snow it is easy to tell fresh tracks from those even a few hours old. You may be able to track a flock and anticipate the direction they are going and have an opportunity to head them off. Tracks that end suddenly or start from nowhere indicate the location where turkeys have flown up or down from a tree. Find this subtle clue and you have probably just found a roost site.
Turkeys are much easier to see in the snow. Out west where the country is open, it is very likely that you could spot a flock from a good distance just by doing some glassing with binoculars. Spotting turkeys is also simpler because the size of the area to search may be reduced if some portions of it are clear of snow. Wind can blow areas clear or the sun will melt the south facing slopes sooner, so check those spots first. Even though turkeys could easily scratch through shallow snow, they seem to prefer clear ground or where the snow is almost gone.
DISADVANTAGES OF SNOW
The biggest disadvantage of a spring snowstorm may be the inability to get to the hunting area. Backcountry roads can be difficult to navigate at best. Many are just not plowed. Even when the storm is over and the snow is melting the roads can be very slippery. However if you happen to be camping in your hunting area when the storm hits, those same difficult roads could keep others from getting in, this turns a disadvantage into an advantage. Just make sure you are always prepared for the unexpected and have plenty of food, water and warmth.
Crunchy snow can be another major problem. Spring snows are almost always a wet snow. The daytime temperature may be close to, or above the freezing mark, but nighttime temps usually go below freezing. This means that slushy wet snow becomes hard and results in a very noisy, crunchy snow by morning. Consequently, it can be extremely difficult if not impossible to move in on a roosted gobbler. Not only can turkeys hear you moving from a great distance, they can see shadows against the snow in very low light. You lose the cover of darkness.
Although, you can see turkeys better in the snow, they can also see you better. For a turkey, their eyes are its greatest asset. It is especially challenging for a hunter to try to remain hidden on a carpet of white. A white sheet over your legs and partially up your waist can help you blend in while sitting up against a dark tree. The sheet can easily be carried in the back pouch of a turkey vest when moving.
As I mentioned previously, turkeys may flock up a bit and that means more areas without turkeys. This can mean a lot of leg work before you make any contact with birds. For Merriam’s this is especially the case because their density is less concentrated. The inclement weather may also tone down the frequency of gobbling.
The cold and wet can make for some uncomfortable hunting. Waterproof outerwear is a must. Since I travel for most of my turkey hunting, I always pack extra clothes and even an old turkey vest as a spare. This allows me to hunt in very wet weather and not have to worry too much if something ends up totally soaked. I can go back out hunting with a spare item while the soaked one is drying. I like to wear Lacrosse rubber knee high boots in wet weather. Even in mountains the ankle fit boots will allow me to maneuver around without any problems and still keep my feet dry. I have an insulated pair I use if it is very cold. With the Lacrosse felt insoles, the boots are very comfortable and I can walk all day in them. A good seat or pad that keeps you dry can mean the difference between a pleasant hunt and a miserable one. Calls and other gear should also be protected or waterproof.
During snowfall, gun sights may become clogged or covered with snow. Even after it has stopped snowing this may occur as you move about and inadvertently brush snow off branches. This becomes a greater concern if you hunt with a scope or dot-type sight on your gun. I always check my sight frequently to be sure it is clear. A scope or dot sight can also fog up in cold wet weather.
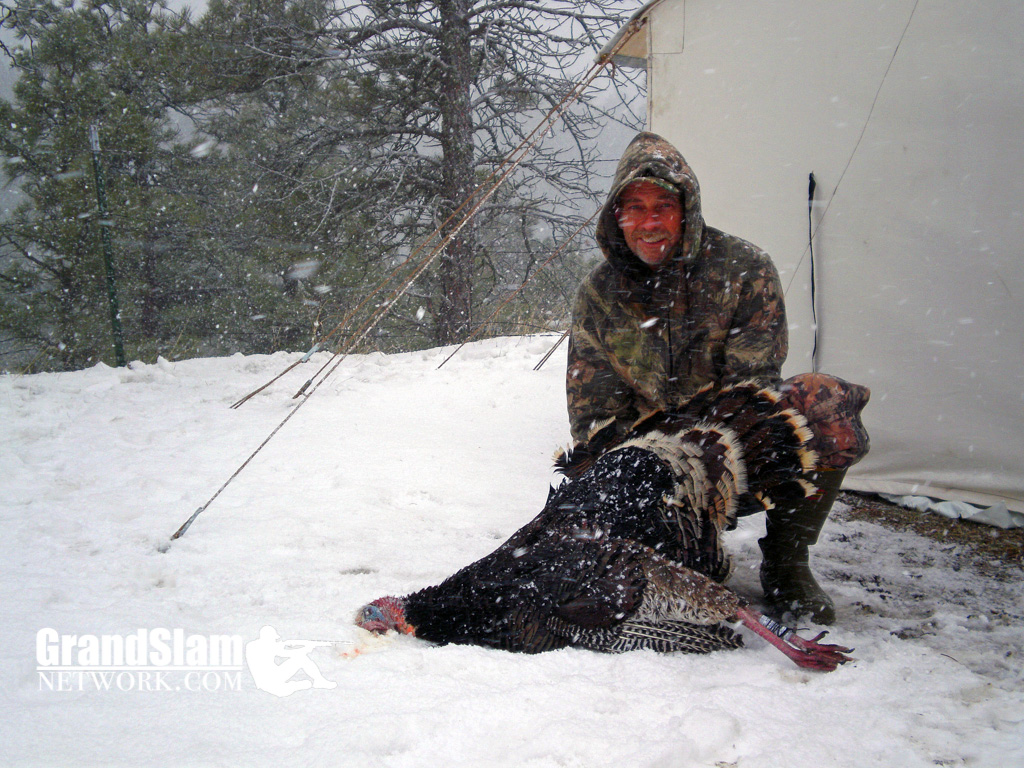
Here If you find yourself in turkey country that is carpeted in white, get after them if you can. There are some added challenges, but some special memories can be made…and you might even end up with a “snowbird.”
First and foremost, I’d like to thank one of our dedicated forum members, Gary Meinke, for providing this target for everyone to use. Its folks like Gary that make Grand Slam Network a great place to hang out!
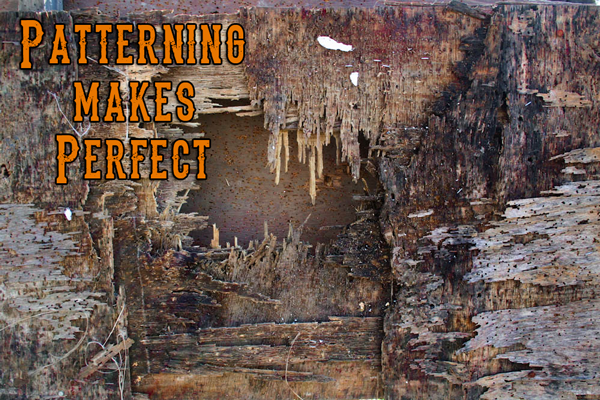
Hopefully before March has rolled around, you’ve pulled out your turkey calls and started practicing. Equally important to calling is making sure your turkey hunting shotgun has a good pattern and that you know it effective range for harvesting a turkey
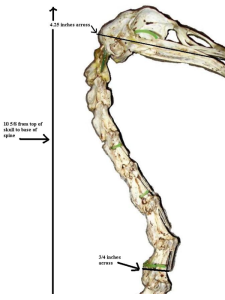
This Turkey Target Download is scaled properly for you to print and pattern your shotgun. Other turkey targets include the actual head and feathers, which can be misleading because you are lead to believe your effective range is further than it actually is.
This Turkey Target Download includes the skeletal system of the turkey neck and head, so that you get a more accurate representation of the effectiveness of your gun at a particular range.
Here’s how you pattern your turkey hunting shotgun
Print several copies of the target and head to the range
Post the target is a safe direction and measure off 30 yards which is a nice starting distance.
Aim at the middle of the neck and shoot
After inspecting the target, you should have a reasonable number of shot in the skeleton.
Keep increasing the distance between you and the target until you discover your effective range.
I have been asked many times what my favorite time of day to hunt turkeys is. I have thought long and hard about this and the best answer that I have been able to come up with is whenever I can go. Most would probably say that they prefer breaking daylight and setting up on a gobbler before fly down, and more often than not, that is my approach as well. I enjoy hearing the woods come alive at daybreak, but I know that I am no different than most, and because of work, family, and other obligations, my opportunities to hunt turkeys may come at other times of the day.
As far as times to get after turkeys goes, my advice would be to go whenever you can. If your schedule allows you to hunt mornings, then by all means go and break daylight with them. If you are doing family activities or anything else early in the morning and find some time to slip away during the middle of the day, try “running and gunning” an area that you know has turkeys by covering ground and trying to get a response. If your work schedule only allows for afternoon hunts, then get after them then. Later in the season here in Alabama, I have heard some of my best gobbling action late in the day. In my experiences with a turkey gobbling in the afternoon, if he is answering your call and appears to be interested, there is a good chance that you can seal the deal before fly up time. If that gobbler decides that he wants to come to you, then he knows that he has to get it done before he goes to roost, so definitely don’t pass up a chance to hunt turkeys in the evenings if that is your only time to go!
I have heard many guys complaining about not going hunting because it was raining. If you have ever been riding around and looking at fields and pastures during and shortly after a spring shower, then you have certainly seen hens and gobblers pecking around in the fields. Earlier this month I was driving home after work and it was pouring down rain. Every pasture that I passed seemed to have turkeys feeding in them. I rushed home and threw on my rain suit and rubber boots only to have my wife ask me if I was crazy enough to try to go hunting in that weather. I knew of a lease of mine just a few miles down the road from my house with a couple of food plots that turkeys frequented regularly. Based on the amount of turkeys that I had already seen in the fields on nearby properties, I thought that there would be a good chance of finding a gobbler before dark that afternoon. As luck would have it, the second field that I glassed had a lone gobbler feeding in the pouring down rain. A stealthy approach on my part, concealed by a downpour of raindrops onto the forest floor, allowed for me to get extremely close to the field without making my presence known. A few soft yelps later, the gobbler was interested and came my way to investigate what he had heard. A short time after that, I was toting him back to my truck with a grin from ear to ear and paying no attention to the soaking rain. I do not recommend going out in a thunderstorm, and will be the first to admit that lightning strikes will send me running to the truck, but I do suggest that if your only time to get after turkeys is during or shortly after a rain, then leave your fancy custom calls in the truck, throw a few mouth calls and maybe a waterproof friction call in your pocket, and head to the woods!
Depending on time of the season, weather conditions, turkey behavior/breeding cycle, and countless other factors that I have not began to understand, gobbling turkeys can be extremely unpredictable. You may go out to the “perfect “spot, with the “perfect” weather on what you think is the “perfect” morning, and you may not hear a gobble. On the other hand, you may go out when it’s extremely cold and conditions appear to be terrible and hear turkeys gobbling in every direction. You may go to a place and hear nothing but silence at daylight, but if you come back to that place midday or late afternoon, the gobblers may be answering every call. You may even go at all these different times and not hear any gobbling. Instead you may hear spitting and drumming, hens “talking,” or turkeys scratching that may give away their whereabouts. You may set up as a last resort thinking that all attempts have ended in failure, only to have a curious tom walk in silently and undetected until he is right down the end of your gun barrel. Turkeys are definitely unpredictable animals, but if you put in your time doing preseason scouting and hunting at whatever time of day that your schedule allows, the odds are bound to be in your favor at one point in time or another!
By Terence Williamson
2 X Yellville National Friction Champion, 2013 World Championship 1st Runner Up – Two Man Team, 2 X 1st Runner Up – NWTF Grand National Calling Championships, 5 X Alabama State Champion, and Prostaff Member for Zink Calls & Avian X Decoys, Patternmaster, HeviShot Ammunition, Mossy Oak Brand Camouflage, Ol’ Tom Technical Turkey Gear
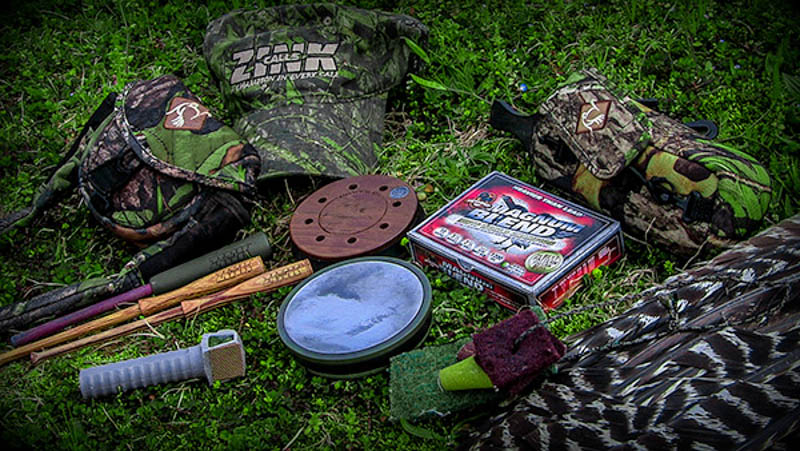
A friction call can be a very valuable tool to carry into the spring turkey woods. Unless it is raining, I never leave the truck without at least two slate calls and a handful of mouth calls. As we will discuss later in these friction call tips, there are even a few friction calls that I carry when it is raining. The main thing to take away from this segment will be learning how to properly care for and condition your call so that it will last for many more outings to come, rain or shine.
Care will be the first topic that we discuss, because if you do not properly care for your call, you won’t have it to use for very long. There are many items on the market today that can make caring for your calls a breeze. Several companies, such as Ol’ Tom Technical Turkey Gear, offer carrying cases that either attach to your vest or a belt loop to store box or slate calls, as well as strikers. These cases offer padded protection in case of falls or other bumps and spills not anticipated while hunting, and also keep your calls close at hand for quick use if needed. Some companies also sell plastic containers to store your slate or pot style calls. A measurement of your call diameters and a few minutes on the Tupperware aisle at the grocery store can leave you with some cheap storage to protect your calls from the elements. Not only will Tupperware containers keep your calls dry, but they also protect the surface from unwanted hits and bumps. I always keep a few gallon size plastic bags in my vest, too. You never know when you are going to get caught out in a rainstorm and these bags are useful for storing calls, licenses, camera, phone, etc. These days a custom friction call can sell for $100 or more and often times if they get wet, they can swell and cause the surface to come unglued. A simple sandwich bag can prevent this, but it’s always better to watch a weather forecast and try to prepare for these conditions. If I know that rain is forecasted, all of the custom wood calls are left at home and I go out with a plastic pot, Zink Thunder Ridge aluminum friction call. I take several different strikers that run when wet (carbon, plexiglass, aluminum) to use on this call, and because the surface is aluminum, it does not absorb moisture. As for a box call during the rain, some companies offer calls that claim to “run when wet” that have been dipped in a waterproof coating, and I keep one of these handy for such occasions. These calls are fairly inexpensive and I have found that some yelp extremely well when wet or bone dry. If I know rain is forecasted, I primarily call on a mouth call, but the added volume of friction calls can often be useful to cut through the rain to locate or work a gobbling bird.
Conditioning your friction call is one of the most important parts of getting the right sounds from your call at the right time during hunting situations. You do not want to have a gobbler to be hung up just over the ridge with you needing to condition the surface of your slate call for clucks and purrs. If he can hear you scratching in the leaves, he can hear you sanding that call. I always start out my day conditioning the surface of my calls and strikers before I ever leave the truck. Depending on the moisture in the air and the frequency of calling, I may need to do this quite often while hunting. To make this task easier, I keep a string with a couple of pieces of scotchbrite and a couple of pieces of sandpaper of different grits, tied to my friction call case. This simple creation keeps the conditioning pads close at hand for quick use so that I do not have to dig through my vest for a piece of sandpaper. Between hunting setups and as often as needed when trying to locate a gobbler, I sand the surface and striker tips to keep them as fresh as possible. Conditioning the striker and surface of a pot style call makes the two surfaces that are rubbing together more coarse or abrasive. As you call, the friction made between the objects produces the sound, hence the name “fricition call.” By keeping your calls conditioned, you are maintaining roughened surfaces that will produce the friction needed to make true turkey sounds. In addition to sandpaper and scotchbrite, some other useful items to put in your vest are conditioning stones and chalk. I have found that conditioning stones work much better to roughen the surface of a glass or crystal surface than using sandpaper alone. I often times roughen the surface with the stone first and then finish it off with a fine grit sandpaper. This really allows for the striker to “grab” to the surface to produce clucks, cutts, yelps, etc. Last but not least to keep in your vest for friction call conditioning would be sandpaper. A box call can be a great call to locate and work tight lipped gobblers, but if you do not have some chalk to condition the lid with periodically, you are not producing the best sounds achievable from your call.
These are just a few tips to help you care for and condition some of your friction calls. These tips may not work on all calls, and may not be the best for all situations. I am always trying to learn more tips and tactics to make hunting simpler and more successful. I hope that these tips will do that for you in some of your hunting affairs as well!
Terence Williamson
2 X Yellville National Friction Champion, 2013 World Championship 1st Runner Up – Two Man Team, 2 X 1st Runner Up – NWTF Grand National Calling Championships, 5 X Alabama State Champion, and Prostaff Member for Zink Calls & Avian X Decoys, Patternmaster, HeviShot Ammunition, Mossy Oak Brand Camouflage, Ol’ Tom Technical Turkey Gear
Spring gobbler fever has really taken hold across the country. As such, more and more of us are making plans each spring to travel to far-away places to hunt our favorite game bird. Those of us that have been doing that for a while have discovered one important fact: conditions change from location to location, turkeys do not necessarily behave the same way in all places, and hunting tactics must be modified, at times, to maximize one’s chances of success in any given locale.
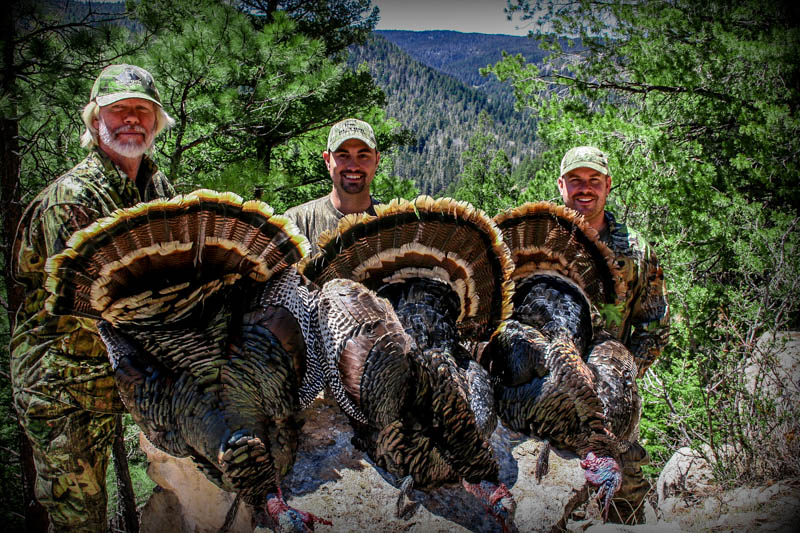
New Mexico turkey hunting offers a physically challenging hunt with Merriams turkey that are exciting to hunt.
Over the years, we have hosted many hunters from different parts of the country at our cabin in the Lincoln National Forest in the mountains of southern New Mexico. In that same time span, I have traveled to other parts of the country to hunt with many of those same folks in their turkey woods.
One thing I have found to be crystal clear, in almost every place, there are preparations needed that are of importance and specific tactics that work better than others. Not only that, but often the preparation and tactics that are a key component for success in one location are things that are rarely effective, and rarely used, in others.
One great thing about these hunting forums is that we all get to chat with, and glean information from, really good turkey hunters from all over the country. Not only are the individuals that hang out here mostly great turkey callers, they also know what is important and what works best in the places they hunt. The difference between success and failure on an out-of-state turkey hunt is often a function of how much attention we pay to the advice given by those that hunt there all of the time.
Here in New Mexico, hunting our high-altitude Merriams gobblers, there are some key ingredients to success. One of the very first ingredients, especially for those coming from around sea-level, is being fit for hunting here. Of course, there is no way of adjusting for the altitude difference, unless you have a handy 8,000 foot tall mountain in the neighborhood that you can go scurry up on occasion. However, it is somewhat important that you get yourself prepared for walking and climbing around at that elevation by doing what you can to get “in shape”.
Another pre-hunt attitude adjustment that is helpful here is to get rid of the “small woods” mindset that often comes from being confined to hunting small tracts of private ground that seems to be the case in many parts of the country. Out here, we have literally hundreds of thousands of acres to hunt, almost all of it public land, and the turkeys are, basically, scattered in varying densities throughout.
We have large areas that have high concentrations of birds and we have significant areas that have few or no birds. The key component here on whether there are turkeys around is most often the reliable availability of surface water. The second important component is the presence of roost trees, or other structures that turkeys will feel comfortable with roosting in.
The point to be made about this is that the first consideration when hunting this country is to find where the birds are before starting to hunt them. That sounds easy enough, but often, those that come here do not understand that they have to “think big” in order to do that. To some, thinking big means covering a few hundred or thousand acres looking for signs of turkeys to hunt, because that is what they are used to doing where they come from. You have to throw that mindset out the window when you come west and hunt the vast amounts of public lands that exist in many places here.
Having maps of the areas you are going to hunt is critically important when hunting these large public land areas, as well. Most of our public-lands turkeys are found on either Forest Service lands, Bureau of Land Management lands, or a combination of both of those. The “fly in the ointment” is that there are almost always private land holdings scattered about these public areas. Both the Forest Service and BLM produce maps of the areas they manage and you can normally order the maps of the areas you intend to hunt from the websites of these agencies.
Having maps that show you road systems and land status (public/private) is essential here. Often, the private land holdings are those areas that were homesteaded or otherwise privatized generations ago when settlers were picking and choosing the best locations for farming and ranching. Many of these areas are still being farmed and as we all know, turkeys like to help themselves to the various crops that farmers are growing. Hence, you will often find concentrations of birds close to these private areas.
Obviously, you cannot hunt private lands without permission and, quite often, it is difficult to obtain that permission. The good news for us turkey hunters out here is that our turkeys like to roost in tall pine trees, and usually those tall pine trees are found on the public Forest Service lands adjacent to these private holdings. And the other good news is that there are generally ways to get around the private holdings through public land routes. Land status maps will show you what those potential routes are, and therefore allow you to find ways to get to birds that you otherwise might think were off-limits to you. Once again land status maps are a critical tool.
Besides the land status, however, these maps can also provide you with a wealth of information on other stuff that is important to your hunt success. Often they will show topography, elevation, and locations of springs and water courses key elements out here.
And for those that are really serious about map use, you can go “all out” and order the detailed topo maps of the area you are hunting. In my opinion, these are of less importance than the agency maps with land status.
Finally, I won’t go into a detailed discussion about “personal affects” such as clothing or footwear. Suffice it to say that bringing clothing that can be layered on or off depending on the temperature and conditions is a good idea, and good hiking boots are advisable. Just so you know, snakes are not generally going to be a problem.
Finding Gobblers to Hunt…Roosting
So the obvious first question is,…”How do we go about finding those pockets of birds in those vast areas?” Well, fortunately, that is usually pretty easy to do. Our gobblers and are generally vocal and willing to gobble, not only in the morning on the roost like most gobblers everywhere, but also in the evening, right at dark, after they fly up to roost. Not only that, but they are very susceptible to shock gobbling tactics during those periods, and often even during the day.
Using roost shock-gobbling tactics is an essential element in finding birds to hunt here. And not only is it important, it is one of the elements that make hunting here so enjoyable. There is nothing quite like the feeling of going to bed knowing where one or maybe even several gobblers are spending the night. That is part of the hunting strategy we face,…deciding which gobbler out of many that might have been located is going to be “the one” for the next morning’s duel.
The next question I hear asked often is. ”What is the best locator call to use out there?” The key to a good locator call in this country is one that is loud. Crow calls work well here, and most of our local guys rely on those more than any other. However, all crow calls, or other locators for that matter, are not created equal. Getting good volume out of whatever kind of locator you choose is a must. If you are not able to really “rip it” with your locator, then find one that you can. It rarely matters what the call sounds like as long as it is loud.
When is your locator work going to be most effective? Like I said, it could work any time, but the times when it will work most effectively are during the low-light periods of dusk and dawn. In the evening, that period of time starting at sundown until about a half hour to forty-five minutes after (or when it gets to be fully-dark) is the best. And what we call “prime time” is that period from when the light is just starting to fade and for about twenty minutes thereafter. Occasionally you will get a gobble out of a tom after full-darkness, but that is much less reliable than the period mentioned. It should be pointed out that the “evening gobble” is not as sure a bet as the “morning gobble”. Even under the best of conditions, there will be gobblers out there that are less enthusiastic about gobbling in the evening than they are in the morning. It is not unusual to hear several birds gobbling in the morning in a location where you only heard a bird or two the night before.
The morning roosting period is similar to the evening, but reversed. Our birds will, at times, gobble well before the first hint of daylight. In fact, when we are leaving our cabin in the morning in the dark, and everybody is banging around in their vehicles and such, our cabin gobblers that roost nearby will often start gobbling at the noise we make (It’s a good way to start the morning’s hunt!). It is more likely, however, that your locator use will be more effective when the eastern horizon is starting to show a bit of glow.and then up until sunrise, and sometimes even beyond for a while.
The strategy for efficient roost locating does not end there, though. The area we hunt is largely public land, which means that there are other hunters vying for the attention of the same gobblers you are. So it is not just a matter of finding a gobbling bird to hunt,…it is also important to find the “right” bird to hunt. Gobblers that are along and close to the roads are likely to get a serious workout during the season from an assortment of hunters. You can pretty much bet your patootie that a mid-season gobbler here that has set up shop close to a road is going to be a tough customer to sell any kind of calling to. Not only that, but there is also the chance that you will have competition from other hunters for the easy-to-get-to birds.
The trick in your roosting strategy then, is not only to find gobbling birds, but to find as many as possible so you can pick a likely responsive candidate for your hunt. Covering as much country as possible during prime roosting time in the evening can be an important tool in your bag of tricks. This is, of course, assumes that you have not already found a bird that you have chosen to focus on. If you have found a gobbler then your evening strategy may change.
Here is your basic method of roosting birds in the evening. Take your map and assess the area you want to cover and the road system within that area. Plot out a route that you think will give you the maximum ability to cover as much country as possible, taking into consideration that you want to be able to hear birds as far away as possible, as well. There are nuances to this strategy that we will touch on later.
Having established your roosting route, plan on being at the starting point when the sun goes down. Remember, gobblers are generally not as likely to gobble at sundown as they are fifteen minutes later, so don’t get in a hurry at this point. If you rush the evening roost, you may well miss birds that will gobble in a bit.
First of all, make sure your method is sound. Check your locator volume by giving it a test run at this point. Of course, you always want to minimize extraneous noises. The vehicle is obviously turned off, and all members of your party are advised to keep the talking and shuffling about to a minimum. It is really easy to miss a faint gobble from a bird a mile away because someone decides they want to carry on a conversation or shuffle around in the dirt right when it happens.
The second thing to remember is that these birds are not responding because you sound like a genuine crow, or owl, or whatever. They are shock-gobbling because of the sudden loud sound they are hearing. So don’t do what some of these guys you see on TV do with their locators and go to squawking like a banshee on the darn thing. These birds will gobble as soon as they hear the very first note of your call, so hit the call a couple of quick, loud notes and then listen intently. If you extend your locator noise beyond that, you will miss distant gobbles because of it.
After listening for about fifteen seconds for responses to the first call, hit the locator again with a couple of loud blasts and listen again. Most of the gobblers that are going to respond to your locator will do so on the first series. On occasion, you will get a response to the second series that did not come on the first but that is the exception rather than the rule.
Once again, don’t get in a big rush until you start seeing the light starting to fade. When things start to get a little blurry, this is the time to put ‘er in high gear. You absolutely do not want to fiddle-fart around now! You want to get from place to place as fast as you can. In this country, it is best to drive at least a half-mile, and no more than a mile, between locator uses, and you want to hit as much country as you can in that window of about thirty minutes of prime time.
This country is made up of large canyons with secondary smaller canyons that run into those, and with even smaller canyons that run into those. Good places to stop and try your locators are at those junctures of main and secondary canyons. So when roosting, always stop and try at these canyon intersections.
So here we go. The lights are starting to fade a bit. We’ve tried the locator at our initial starting spot. If it got a response, we have mentally marked where the bird or birds are at. We jump in the vehicle and quickly “fly” on down the road to the next spot that looks likely. We pull over, turn off the engine, and pile out of the vehicle quickly.
Everyone is quiet, and if they are not, they are summarily admonished for not being so.
The assigned locator guy gives two loud bursts on the call. Everybody listens quietly for a response. If a bird is heard, there is no need for a second round. We mark any birds heard, make the appropriate mental notes about the location and whether there is a likely candidate for a morning hunt here, and jump back in the vehicle. And down the road we go again.
Next stop: same scenario and again and again until it is full darkness, and we are not getting any more responses. At any stop, if there is not a response on the first series, we have waited fifteen seconds and blown the call a second time. Anything after a second attempt is almost invariably a waste of precious roosting time.
Early in the season here, it is not unusual for a roosting run to produce fifteen, twenty, or even more gobblers responding to your calls. Later in the season, the birds will have been picked over some, and some will have wised up a bit,….but it is still not unusual, even at the end of our season, to be able to roost multiple birds each evening by doing this.
One important consideration in choosing an area to try to roost birds is the weather situation at the time. More specifically, that “situation” is whether or not it is windy. Wind is our biggest enemy in hunting here, and it has some serious consequences in terms of affecting roosting. Like I said, this country consists of large canyons and ridges, and the altitude varies from around 7,000 ft. up to almost 10,000 ft. When it is windy, the higher up you get, the windier it usually is. What that means for locating birds is that you have to tailor your roosting strategy, or at least the areas you choose to try to roost gobblers in, according to the wind conditions of the day. We have all learned that if the wind does not start dying down as it gets close to sunset, or if it blows all night long, that roosting is going to be tough. The general attitude is,…if the wind is up, don’t bother trying to roost birds on the high ridges, and don’t expect a lot of gobbling anywhere.
Regardless, this roosting process allows you to pick and choose the birds you want to hunt, and gives you options for hunting our public lands Merriams that you would not otherwise have.
I will be the first to admit that I was skeptical of the aluminum and other high frequency friction calling surfaces for a long time. High frequency turkey calls are calls that are able to produce the natural sounds of the wild turkey at a louder and much higher pitched level than a traditional call. About fifteen years ago, one call company that had previously been making my favorite friction call in the conventional glass, slate, and crystal surfaces began making calls with aluminum and even ceramic surfaces. I was very hesitant to try these calls for a while and thought that they were just another gimmick to try to sell more products. Seven or eight years ago, a good friend of mine that has been very successful both in the turkey woods and on the competition stage told me how well these calls were working to call in the tough Alabama Eastern gobblers that we had always hunted. After finally buying and running one myself, I no longer step into the woods on a Spring morning in pursuit of a gobbling tom or walk onto a stage for a calling competition without an aluminum friction call by my side.
Today you can purchase an assortment of calls of higher pitch or frequency than a traditional glass or slate call is able to produce. Many companies now make friction calls that combine a crystal or aluminum calling surface over a walnut or cherry pot. You can also find an assortment of box calls that combine cherry or cedar wood boxes with exotic wood lids that are very capable of reaching the higher notes that is often necessary to locate a wary tom. Personally, I keep a Zink Calls Thunder Ridge Series aluminum pot style call and an all cherry wood box call in my vest to achieve these sounds. The combination of striker and call can really intensify the sound that these calls can make when matched properly. I have found that purpleheart or hickory two piece strikers and laminated oak or birch flaretip one piece strikers can really reach a high pitch when paired with the right crystal or aluminum surface. To condition these surfaces, a scotch brite pad works best on an aluminum call and a conditioning stone is my preference for the crystal pot.
Most of my success with these high frequency calls comes from mid-morning to late afternoon. I start my morning off like most hunters, either waiting for a tom to gobble on his own or by blowing an owl hooter or other locator call to pin point his whereabouts. After that, I try to move in as close as possible without spooking the bird and setup in an attempt to trick him into coming my way. If my morning battle with the gobblers does not end successfully, I begin covering ground and using the high frequency friction calls. I prefer to walk the logging roads or ridges, which more often than not in my hunting grounds of West Alabama are covered in plantation pines or are cutovers from some phase of the logging process. During these walks, I frequently stop to yelp in areas where I have either planted food plots, seen turkeys, found sign while scouting, or in areas that will carry the sound of my calling as far as possible. I start out by clucking on the Zink Calls Thunder Ridge Aluminum pot call and I begin calling fairly soft and quiet. I do this because I have always been told that you can always call louder to try to make a gobbler hear you, but you can never get a chance to call softer to a gobbler that you cut and cackled to and scared off that was just over the next ridge. If my initial soft clucks and yelps don’t coax him into a gobble, I will get more aggressive with my clucks and yelps on the aluminum pot while gradually getting louder and putting more emotion into the calling. The clucks and yelps often transition into excited yelping or a series of cuts that often shocks a gobbler into letting you know his position. I have stood on the same ridge and done two or three renditions of this five to ten minutes apart before finally getting a gobble. This whole process often starts out mid morning and goes well into the afternoon if I have a large enough tract of land to cover or if I know turkeys are in the area. These sounds are not limited to the aluminum pot call, and I will often mix it up and make the same calls on a cherry box shortly after running the aluminum call. This sound simulates several hens communicating back and forth which can often coerce a gobble from a tight lipped tom. Once I do get an answer, I do not back off with the intensity of my calling until I know the gobbler is headed my way, and even then, I probably push the limits with the aggressiveness of my calling. I love to hear them gobble, which I know you can make them do too much at times, but this is why I call harder and louder to toms in this situation. More often than not, if you have a mid-morning to late afternoon bird answering you, then his gobbles are just as aggressive as your calling and if your cards are played right, you often get a chance to close the deal! I use a modified version of this tactic for late afternoon toms. If I do not have a gobbler pinpointed, then I will go to an area where I know birds were during the morning or where they frequent in the afternoons. I will often set up a lone hen looker decoy prior to starting my series of calls, and my decoy of preference is from the Avian X line of turkey decoys. I will start off calling softly just like it was breaking daylight. I will switch from soft yelps to clucks and purrs, all the while, scratching in the leaves trying to sound like feeding turkeys. This soft calling that starts out on a Zink Calls two reed mouth call, eventually turns into the loud and aggressive calling on the high frequency aluminum pot or cherry box calls if have not gotten a response during the first half hour of my setup. Just like midday hunting, if I get a response from a gobbler, I keep pouring the calling to him trying to keep him excited enough to come my way in time to bag the bird before he flies up onto the limb.
The situations, setups, and calling styles mentioned are definitely not ideal for every situation, or every hunter for that matter, but I have found that they have worked for me over the last few years from Florida to Tennessee to Texas, and everywhere in between. High frequency turkey calls definitely bring a new element to calling and hunting situations, and they add one more weapon to your arsenal of tactics that you can try on tight lipped gobblers. If you are like me, you are willing to try anything that it takes in an attempt to tricking a gobbler to commit to your setup, and I hope that by reading this, you have either added one more tool to your tool belt or at least been mildly entertained. If you are going to try this tactic and are not yet equipped with the right gear, then I would definitely give the high frequency friction calls manufactured by Zink Calls and the lifelike and portable Avian X Decoys a try this turkey season.
Terence Williamson
2006 & 2011 National Friction Champion
Prostaff & Elite Calling Team member for Zink Calls, Avian X Decoys, Mossy Oak, Ol’ Tom Technical Turkey Gear, and HeviShot Ammunition
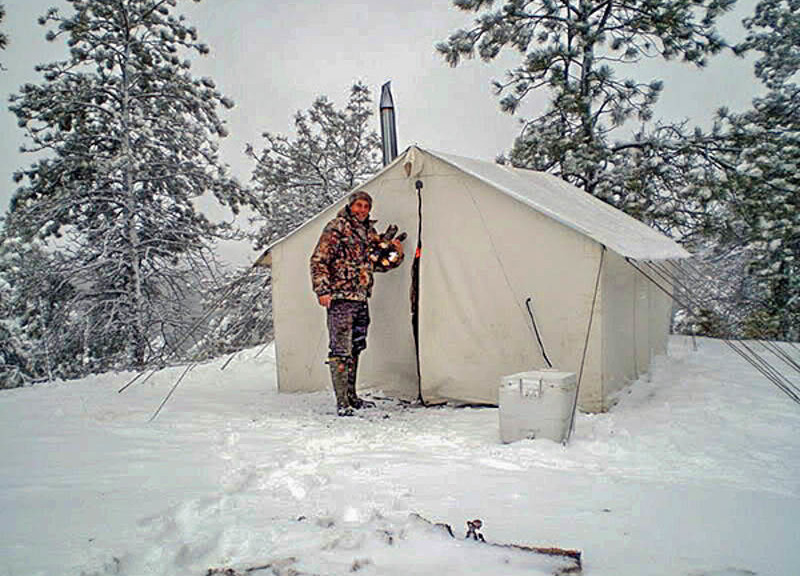
I love the smell of Ponderosa Pine, wood smoke, and canvas. Backwoods camping adds a whole other element to turkey hunting. Living in the outdoors for several days helps me become more in tune with the woods. I can forget about the “real world” and just concentrate on my turkey hunting and enjoying the entire experience. The ability to just walk out the door and go hunting is more than a convenience; it is an engagement with in nature.…
When I first started traveling for my turkey hunting I slept in the back of my pickup truck fitted with a topper. Then I towed a camper trailer for several years. Now I finally have settled on a canvas wall tent as my main camp lodge. I’ve been hunting with one for 7 years now. The wall tent is roomy enough to easily stand up in and it has a woodstove for a source of heat. That heat is what makes the difference between just staying in a tent and having a comfortable abode. I can fit my whole camping outfit in my truck without having to tow a trailer. Not having to tow anything improves gas mileage and also allows me to get into areas I might not be able to get to otherwise. Over the years there have been a number of hunting areas I could not have reached due to muddy and snowy roads, had I been towing a trailer. Another advantage I like about a tent is when the weather gets hot a well ventilated tent set up in the shade can be cooler than a camper.
Backwoods camping in the area I hunt is an advantage because there is no driving time. Some motels can be a half hour or even an hour drive from a hunting area. This saves time at both ends of the day, not to mention money. During turkey season the more sleep I can get, the better. I also don’t have to fight sloppy difficult to navigate roads if the weather happens to be bad or turn bad while I’m out hunting. I might not have to “quit early” in order to “get out”.
I have refined my tent camping over the years and thought there may be some ideas that could be useful should you decide to try a tent camp for turkey hunting. My wall tent is 10’x12’ and has a frame made from conduit. The canvas is waterproof, mildew resistant and has a fire retardant on it. This type of canvas can be stored wet for a few days, but does need to be dried out before long term storage. There is no other maintenance involved other than storing the tent in a dry place. I keep my tent canvas in a large plastic container to prevent mice or other pests from accessing it. I also have a waterproof tarp specially fitted from the manufacturer to go over the tent. The tarp helps shed a hard rain or snow and also insulates the tent during cold weather. There is no floor in my tent; the woodstove quickly dries out any wet ground. If I happen to expect snow on the ground when I arrive, I bring a scoop shovel to clear the area where the tent will be set up.
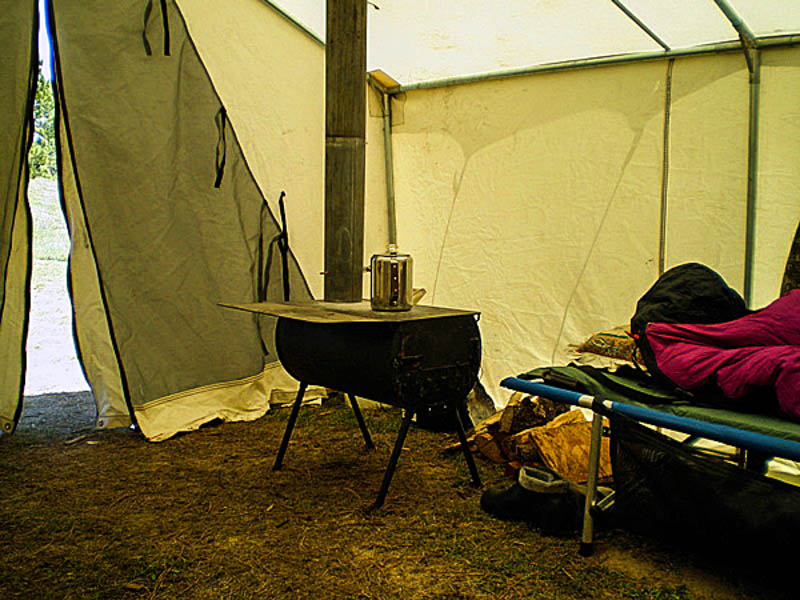
The woodstove is sized to the tent. Having a stove too large can easily overheat your living space, and too small of a stove may not provide enough heat if the weather turns cold and windy. Most of the wood I use to burn I bring with me, but in some areas you may be able to cut or collect your wood right there. Just be sure it is legal beforehand. Kindling is also brought along to ease the starting or restarting of a fire. Wood ash must be dealt with so I have a small ash shovel and I use a metal bucket to hold the ashes until they are cooled enough for disposal. The ash bucket also carries the tent stakes during transport. A spark arrester on top of the stovepipe is needed to keep sparks from flying out and landing on the ground, nearby trees or the roof of the tent. The woodstove is also used to do a lot of cooking.
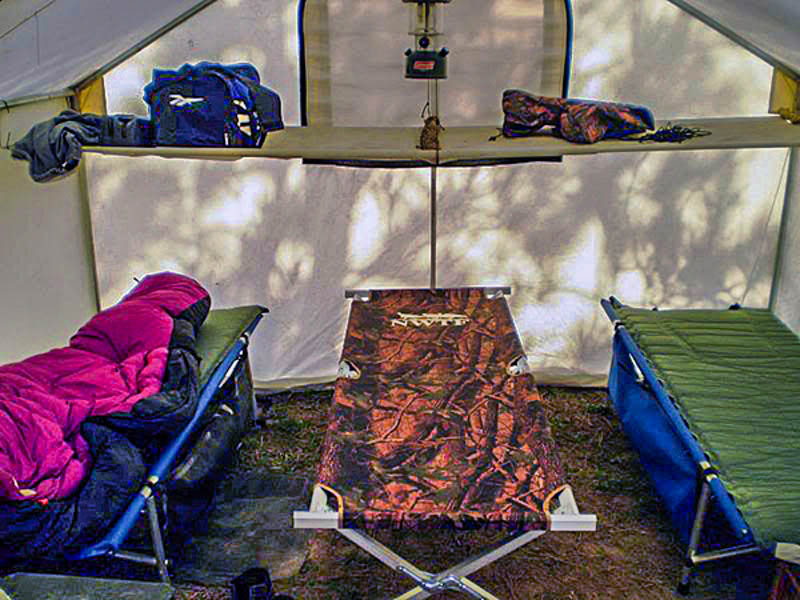
I have a couple of Roll-A-Cots® for beds. They get you off the ground for a good nights rest, are light, and pack up fairly small. A pad for the cot will help insulate you from cool air underneath and provide additional padding for comfort. My tent is designed for two hunters, but three hunters can be accommodated. I made a cloth and conduit shelf to go across the back of the tent to keep clothes and other clutter out of the way and off the ground. The shelf is supported by the tent frame and folds up for transport.
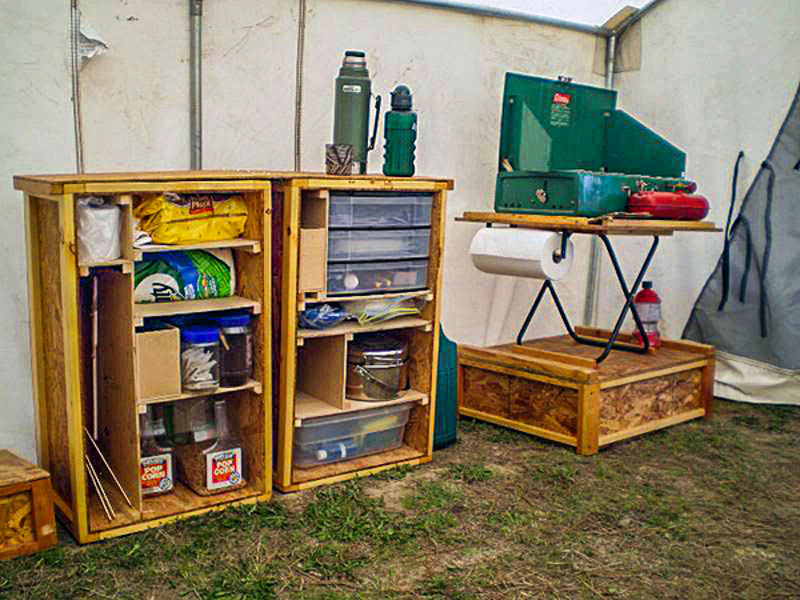
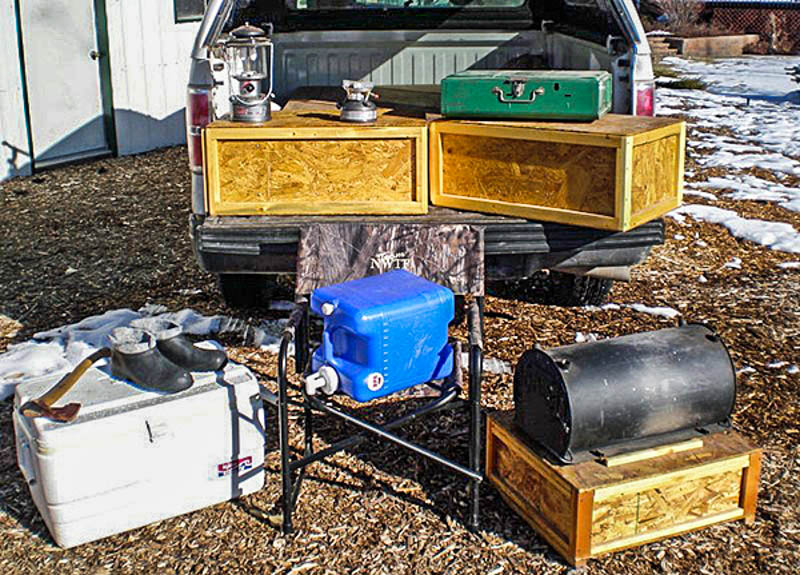
I built food and kitchen boxes to organize the food and cooking utensils. Most of the items in these boxes are never unpacked. I use the items directly from the storage boxes. To get ready for a trip I just have to resupply some food. A hinged board that stores inside one box goes across the top and locks the two boxes together to make a handy countertop. For transport, the boxes each have a lid and they can be hauled in a horizontal position without disturbing things inside (Fig. 5). Most of the food in the grub box is kept in sealed plastic containers to keep any critters from helping themselves. I also built a box that holds all the woodstove parts (stovepipe, fire grate, etc), except the stove body itself. This box then converts into a table for use inside the tent.
Below are the grub and kitchen boxes with lids on and ready to transport. The woodstove is on top of the stove parts box/table. A water jug with a spigot is a handy source of running water. I usually carry two of these 7-gallon water containers with me. A Coleman® lantern is used to supply the light at night. The lantern is hung form the center support in the tent and I always have an extra set of mantles on hand. A two burner Coleman® stove is used for cooking if the weather is too hot to have a fire going. A single burner stove can replace the bigger two burner if I don’t expect to do much cooking on it.
Camp slippers are very convenient. Mine are just a pair of rubber overshoes with some felt boot liners in them. The liners are cut short so they don’t stick up to far. It’s always nice to get out of the hunting boots, and these slippers are warm, comfy, and easy to get on and off. The rubber allows you to walk around outside if the ground is wet or there is some snow. An axe is always a handy item around camp. The scoop shovel is brought along to clear the ground of snow where the tent will be set up if that is necessary.
I use an Igloo® 5-day cooler to store any perishable food. Most of my hunts are about five days and there is usually still some ice left in the cooler on the fifth day, even in hot weather. Since I would rather hunt than cook, I make up three or four days worth of sandwiches already wrapped in cellophane. These are nice to just throw in your vest in the early morning, or have ready to eat when you get back to camp after a hunt. I also freeze some home-cooked dinners (e.g. lasagna, turkey and stuffing) in a vacuum -seal bag and drop them into boiling water to heat them up before unsealing.. The sealed bag dinners really cut down on dirty dishes since I can place the bag in a bowl or pan and cut the top open and eat directly from the open bag.
If you think you might want to consider backwoods camping for turkeys, and happen by a wall tent in your travels…well come on in! It’s warm inside and there is a fresh pot of coffee on the woodstove.
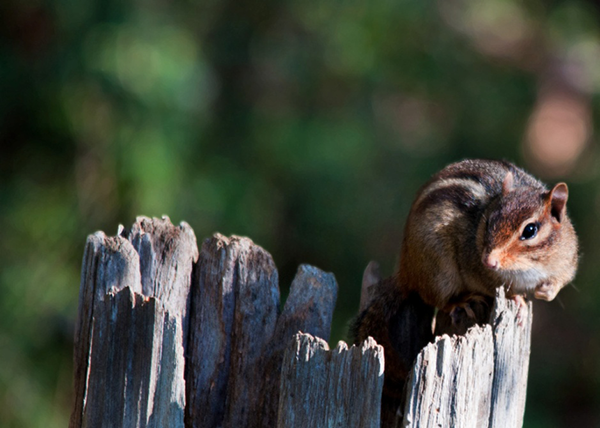
With the popularity of cameras and camera phones these days, it seems we are looking at or taking snapshots on a daily basis. I believe, armed with a few wildlife photography basics, we can go from snapshot to photograph. In my world a “snapshot“ is a picture that impacts the folks associated with it, where a photograph appeals to most everyone who views it. The biggest thing that differentiates the two is composition.
As with any of the arts, whether musical arts, language arts, or the visual arts there needs to be a flow or rhythm. Deciding how to direct the viewer’s eye through the frame is your job for composition. You can have a poorly executed photo, with good composition, and it can be enjoyed by many. Whereas a perfectly exposed photo with poor composition, will be quickly looked over.
In photography, you can’t discuss composition without touching on The Rule of Thirds, The idea is not a new one. Painters have used this concept for hundreds of years. Basically, if you come in from the edges of your picture one third of the way and place a line, you will make a “Tic Tack Toe“ grid. Where the grid lines cross are considered Power Points. Placing your subject on one of these lines, and even better on a power point will give your photo more punch. The intent is to get the subject out of the center of the frame. Keeping things in the center will create a static type photo. With wildlife we can carry the idea a step further using vectors.
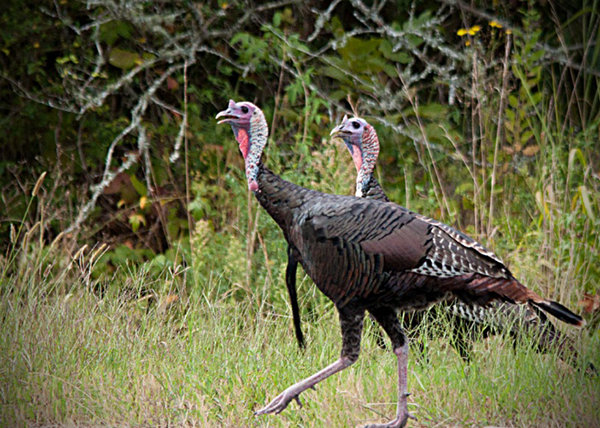
Vectors refer to implied directions. Is the subject moving or looking in a certain direction? If so, we want them to be moving into, or looking into the frame. If our animal is looking to the left, His eye should be on the right side third’s line. If we were to place the eye on the left side, the animal would be looking out of the frame, and the viewer would naturally follow the vector right off the page. That is not our goal, we want the viewer to gaze as long as possible.
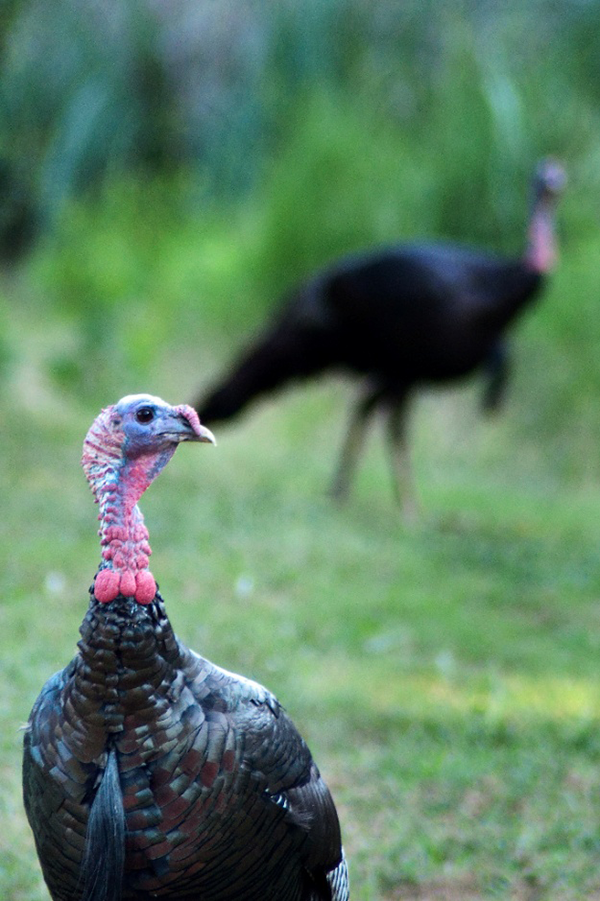
There will be times when we will have more than one subject in the photo. In these cases we need to think about balance. As the viewer of a photograph, we subconsciously place visual weight on each element in the frame. For instance, when photographing two subjects (hunter and game) they need to be placed as to balance each other. Not necessarily side by side, but in harmony, and not all on one side.
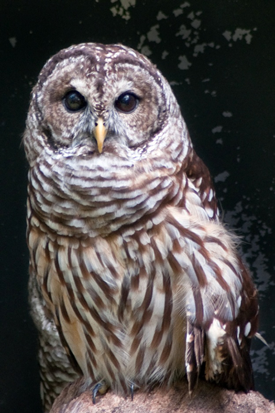
Using a camera and not a phone there is an additional tool used to direct the viewer’s eye to the subject called selective focus. This is where you can make use of the aperture, to create a pleasingly blurred background. We automatically look to things in focus. With the background blurred; the viewer’s eye will go straight to the in focus subject. To achieve this simply set the camera’s f/stop to its smallest number and keep some open space behind your subject. This means you have to get the camera out of “Auto“ mode.
Getting out of auto is not as hard as it may seem. I suggest to start off in Av (For Cannon) or (A) for Nikon. This mode allows you to choose the f/stop, and the camera will calculate the shutter speed. I find this best in rapidly changing light, like at sun rise or set. In this mode you only need to decide if you wish for a blurred background (small f/ number) – it doesn’t matter background (f/8 plus or minus a stop or two) or a background that is sharp (f/12 on up). When photographing subjects like birds (turkeys, ducks, etc.) I always use full manual. This allows me to choose the highest shutter speed as possible. A fast shutter of around 1/1000 of a second or more will freeze motion a renders better fine feather detail.
If you are using a DSLR, you will need to decide on what file format to save your captures in. My choice is RAW. You may choose jpeg or even both. I like to be in charge of how my art is processed, thus I use RAW. With JPEG the camera decides contrast, saturation, white balance ETC. With RAW you make the photo your art. It is my opinion that every digital photograph will need some optimization. Some type of photofinishing software will be needed. There are several good free software programs on the web. One popular today is Gimp. My choice though, is Photoshop.
In Summary
With any live creatures, the focus needs to be on the eye.
Use the Rule of Thirds to get the subject out of the center of the frame.
Be sure the subject is looking or moving into the frame, so the viewer’s eye doesn’t move off the page.
Level the horizon line, a mistake made by some advanced photographers too often.
When you focus on your subject, but before you trip the shutter. Look around the viewfinder for anything out of place. Elements like trees growing out of heads, phone poles and power lines all can usually be removed by a step to one side or the other.
Get out of AUTO; learn how the Exposure trio relates to each other.
Use selective focus to your advantage. A pleasingly blurred back ground will make your subject pop.
When photographing Birds, use the fastest shutter speed possible to freeze motion and achieve better fine feather detail.
Get photo editing soft ware to optimize your photographs.
Search out a way to receive good honest critique on your work.
Every Spring, turkey hunters breakout their best turkey hunting shotgun to check the pattern and make sure things are in working order. Patterning a shotgun for turkey hunting is as much necessary as it is fun – you need to be confident in your gun and its effective range. As Jamey explains, modern turkey loads like the new heavier-than-lead (HTL) turkey shotgun loads are more expensive than their lead counterparts. However, do your homework, and the results will show the best turkey shotgun patterns are found in the HTL loads due to the higher shot count and thier resistance to flyers. For these reasons, I shoot HTL turkey loads out of my shotgun! – Grant
In recent years many turkey hunters have decided to make the switch from shooting lead shot to one of the heavier-than-lead alternatives in their best turkey hunting shotgun. Others are wondering “what’s the big deal and why would anyone want to quit shooting turkeys with good old lead 5’s?” Well at some point everyone who made the switch has asked that question as well so it seems that this would be a good topic to look at a little deeper.
The decision to switch has been easy for some and difficult for others, myself included, and it could do us all some good to take a look at some factors that could contribute us to making that decision.
Let’s look at shot history
Lead shot has been around for a long time and has been the standard shot used for most small game hunting for everything from doves, quail, rabbits and squirrels and even larger game such as geese and turkeys. Lead shot is reasonably inexpensive and readily available in most sporting goods outlets and with its heavy weight it has proven to be an excellent shot material…it does however have some problems. Several years ago lead shot was outlawed for waterfowl hunting when it was discovered that the excess shot was being ingested by waterfowl while they were feeding and ultimately was causing damage to the breeding success of waterfowl. Its standard non-toxic replacement has been steel shot which is harder and considerably lighter than lead which therefore means it can’t be shot safely through some older shotguns and has a lesser killing range.
Ever since steel shot came on the market, there has been an effort to develop better alternatives which would perform as good as or better than lead and still be non-toxic to waterfowl and over time we have seen shot such as Bismuth, Hevi-Shot, Federal Heavy Weight, and Tungsten (commonly called TSS) come onto the market. Several of these have proven to be deadly in turkey hunting loads as well.
Material properties
Steel shot weighs about 7.5 grams per cubic centimeter (g/cc) and is harder than lead.
Lead shot weighs about 10.6 g/cc and is a relatively soft metal, deforms easily and is reasonably gentle on a gun barrel.
Hevi-Shot weighs about 12 g/cc and is a mixture of tungsten, nickel and steel and is a much harder metal than lead. It can damage the inside of the barrel of a shotgun and therefore must be loaded with thicker shot wads for more barrel protection.
Hevi-13 weighs about 13g/cc but is otherwise similar to regular Hevi-Shot.
Federal Heavy Weight weighs about 15.2 g/cc and has a higher percentage of tungsten in the metal which makes it heavier than the previously mentioned materials.
TSS weighs about 18 g/cc and has the highest percentage of tungsten of any shot available today and is therefore the heaviest shot currently available. It is an extremely hard material and requires even more precautions than the others to protect the shotgun from damage.
Loaded properly, any of these materials can be used for many years of turkey hunting without causing any shotgun damage.
Performance Comparisons
It is generally accepted that steel shot should not be used for turkey hunting.
Lead shot has proven to be a good turkey load and the most common shot size is probably #5. This shot size has enough energy and penetration to kill a turkey cleanly out beyond 30 yards as long as the pattern density is adequate.
Hevi-Shot #6 performs a little better than a lead # 5 and since the pellets are smaller it is possible to have more of them in the shell which makes the pattern denser as well.
Hevi-13 #7 performs about the same as lead #5 and Hevi-Shot #6. Smaller shot again allows it to have a denser pattern than the previously mentioned loads.
Federal HW #7 pellets perform even better still and if it were available in #8 shot it would actually be similar to those mentioned above. The Federal shell however uses an unusual shot wad that many shotguns do not shoot well. This shell/wad requires a more open choke and works best with non-ported chokes. Some shotguns will shoot this shell wonderfully while others never seem to work well with it.
TSS #9 performs similar or better than all of the previous shells mentioned and with the extremely small shot size it is possible to shoot extremely dense patterns out to 40 yds and beyond.
Killing Power
Let’s face it, to kill a turkey with a shotgun two things are necessary; a dense enough pattern to place shot pellets in the “kill zone” of the head and neck, and pellets that carry enough energy to penetrate bone and into the vitals once they arrive on target.
With all other factors being equal, hard shot pellets will pattern more evenly than softer pellets due to the soft material being more easily deformed under the intense pressure it undergoes when the shot is fired. This is caused both by the initial compression on combustion and also by the shot being squeezed as it passes through the choke. When a pellet deforms it tends to fly erratically rather than straight and this can cause “flyers” and also cause the pattern to “open up” quickly as it travels downrange. Harder shot patterns open up also but at a lesser rate.
Pellet energy can be determined by formulas but it boils down to a combination of pellet weight and speed.
Penetration is based on energy but also takes into consideration pellet diameter. As an example, if you were to take a pencil and “stab” yourself with the eraser end and then do the same thing using the same force with the pointed end, which end do you think would penetrate deeper? It is not too difficult to see that a small pellet will penetrate better than a larger one even if they both have the exact same amount of energy.
Since speed plays an important factor in energy it should also be pointed out that a large lead pellet and a small tungsten pellet that may have equal energy as they leave the shotgun will not still have equal energy at 40 yds due to the fact that the larger pellet has more wind resistance and slows down more quickly than the smaller pellet. This can be demonstrated by throwing a BB and a ping-pong ball together and see which one slows down the quickest as they travel.
Cost
It is no surprise that once we go higher up the ladder than lead shot, we also go up in cost. I recently priced some 12ga turkey loads in lead, Hevi-shot, Hevi-13, Federal HW and TSS and here are the results with the prices averaged from several retailers.
Lead #5 1-3/4oz shot – $1.70 per shell – 296 pellets
The last two are my actual costs for loading my TSS shells with no labor cost applied.
As you can see, other than with the lead shot, the cost per turkey shell really is pretty equal overall and I am spending about the same to kill a turkey with my little 20ga as others would to kill him with a big 12ga shotgun.
Conclusion
I have heard folks often state that the reason they keep shooting lead at turkeys is because of the cost. I submit to you that although I spend more money than I care to admit hunting the wild turkey, the amount I spend on my ammo doesn’t even scratch the surface of the overall expense. In fact my shell cost is likely one of my lowest expenses in turkey hunting and I can’t see any reason shell cost alone should cause someone to continue shooting lead.
Each of the pellets discussed, from lead to TSS, will kill turkeys within their limits and it is not my intention to convince anyone to switch loads but rather to better understand the differences between pellets so you can make an educated decision when choosing your turkey ammunition.
Ultimately I believe we as turkey hunters have an obligation to do everything in our power to cleanly kill every turkey we shoot at without wounding him and letting him get away to die later. No matter which type of load you choose I encourage you to practice shooting and pattern your gun so that you know exactly what it is capable of and then hunt within that capability.
Remember, a good rule to follow is to not shoot at a turkey further than your gun can reliably put 100 pellets inside a 10″ circle. That may be 30 yards for some and 45 for others but you won’t know unless you pattern your gun.
For reference, my 20ga consistently places 170 pellets in a 10″ circle at 40 yards using Federal HW #7 shells and 300+ using my TSS #9 hand loads. I get well fewer than 100 using lead #5 and my acceptable range using lead would be only around 25 yards but that is why I don’t hunt with lead.
Please note that some states have outdated laws that are based on lead shot and restrict turkey hunting to size 7 shot or even larger so you should consider that before heading out to hunt with TSS 9 shells.