With the popularity of cameras and camera phones these days, it seems we are looking at or taking snapshots on a daily basis. I believe, armed with a few wildlife photography basics, we can go from snapshot to photograph. In my world a “snapshot“ is a picture that impacts the folks associated with it, where a photograph appeals to most everyone who views it. The biggest thing that differentiates the two is composition.
As with any of the arts, whether musical arts, language arts, or the visual arts there needs to be a flow or rhythm. Deciding how to direct the viewer’s eye through the frame is your job for composition. You can have a poorly executed photo, with good composition, and it can be enjoyed by many. Whereas a perfectly exposed photo with poor composition, will be quickly looked over.
In photography, you can’t discuss composition without touching on The Rule of Thirds, The idea is not a new one. Painters have used this concept for hundreds of years. Basically, if you come in from the edges of your picture one third of the way and place a line, you will make a “Tic Tack Toe“ grid. Where the grid lines cross are considered Power Points. Placing your subject on one of these lines, and even better on a power point will give your photo more punch. The intent is to get the subject out of the center of the frame. Keeping things in the center will create a static type photo. With wildlife we can carry the idea a step further using vectors.
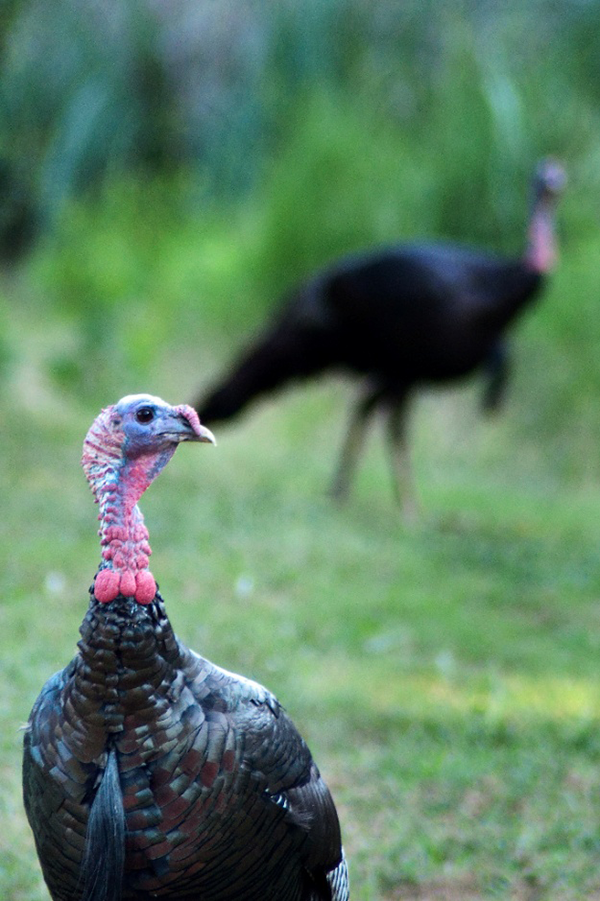
Vectors refer to implied directions. Is the subject moving or looking in a certain direction? If so, we want them to be moving into, or looking into the frame. If our animal is looking to the left, His eye should be on the right side third’s line. If we were to place the eye on the left side, the animal would be looking out of the frame, and the viewer would naturally follow the vector right off the page. That is not our goal, we want the viewer to gaze as long as possible.
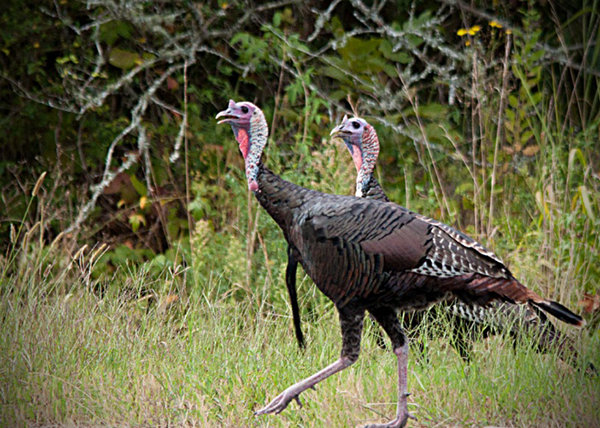
There will be times when we will have more than one subject in the photo. In these cases we need to think about balance. As the viewer of a photograph, we subconsciously place visual weight on each element in the frame. For instance, when photographing two subjects (hunter and game) they need to be placed as to balance each other. Not necessarily side by side, but in harmony, and not all on one side.
Using a camera and not a phone there is an additional tool used to direct the viewer’s eye to the subject called selective focus. This is where you can make use of the aperture, to create a pleasingly blurred background. We automatically look to things in focus. With the background blurred; the viewer’s eye will go straight to the in focus subject. To achieve this simply set the camera’s f/stop to its smallest number and keep some open space behind your subject. This means you have to get the camera out of “Auto“ mode.
Getting out of auto is not as hard as it may seem. I suggest to start off in Av (For Cannon) or (A) for Nikon. This mode allows you to choose the f/stop, and the camera will calculate the shutter speed. I find this best in rapidly changing light, like at sun rise or set. In this mode you only need to decide if you wish for a blurred background (small f/ number) – it doesn’t matter background (f/8 plus or minus a stop or two) or a background that is sharp (f/12 on up). When photographing subjects like birds (turkeys, ducks, etc.) I always use full manual. This allows me to choose the highest shutter speed as possible. A fast shutter of around 1/1000 of a second or more will freeze motion a renders better fine feather detail.
If you are using a DSLR, you will need to decide on what file format to save your captures in. My choice is RAW. You may choose jpeg or even both. I like to be in charge of how my art is processed, thus I use RAW. With JPEG the camera decides contrast, saturation, white balance ETC. With RAW you make the photo your art. It is my opinion that every digital photograph will need some optimization. Some type of photofinishing software will be needed. There are several good free software programs on the web. One popular today is Gimp. My choice though, is Photoshop.
In Summary
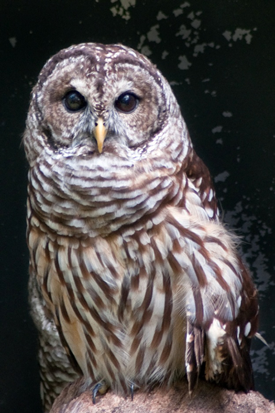
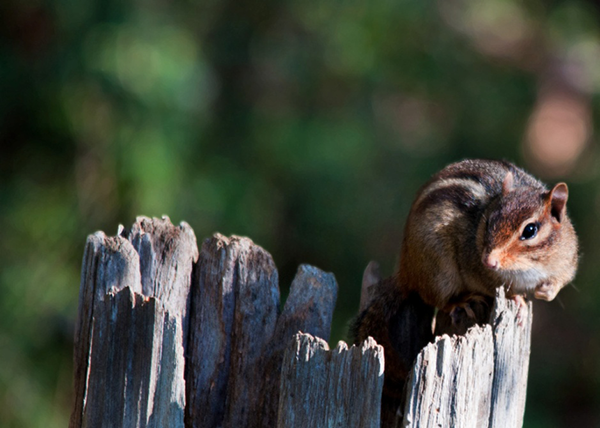
With any live creatures, the focus needs to be on the eye.
Use the Rule of Thirds to get the subject out of the center of the frame.
Be sure the subject is looking or moving into the frame, so the viewer’s eye doesn’t move off the page.
Level the horizon line, a mistake made by some advanced photographers too often.
When you focus on your subject, but before you trip the shutter. Look around the viewfinder for anything out of place. Elements like trees growing out of heads, phone poles and power lines all can usually be removed by a step to one side or the other.
Get out of AUTO; learn how the Exposure trio relates to each other.
Use selective focus to your advantage. A pleasingly blurred back ground will make your subject pop.
When photographing Birds, use the fastest shutter speed possible to freeze motion and achieve better fine feather detail.
Get photo editing soft ware to optimize your photographs.
Search out a way to receive good honest critique on your work.
Spring will be here before we know it, and a self-proclaimed turkey hunting addict can only sit in a tree waiting for BIG bucks for so long. It’s time to break out the new gear for Spring and see what makes the cut and what doesn’t. One thing is for sure – the GoPro HERO3 will be riding the barrel of my shotgun this Spring. Here is my GoPro HERO3 Review!
Out of the box, the GoPro is much smaller that I expected. Its roughly 2×1.5” and comes with a few accessories and a clear waterproof housing. The housing works great, and my 2 year old daughter gave it the bathtub test, and it STILL works! It comes with several mounting accessories, but I have the suction cup and handlebar mounts. The suction cup, as you’ll see in the video is good for mounting the GoPro on the side of a car, a window, etc. I’ll use the handlebar kit to mount the GoPro on the barrel of my gun or on the bow’s stabilizer. You can also buy a remote, which I think I’ll buy soon.
Out of the box, the camera does lots of various types of shots, but I’ve just tested the HD video thus far. It appears to have a wide angle lens that is great for POV shooting and the image is crystal clear. As you’ll see in the archery video, it’s not great for long range shooting, but the wide angle lens makes a nice match for POV shooting…
Stay tuned for some Spring turkey hunting with GoPro HERO3!
Caping out a turkey and preparing it for display is simple to do and takes very little time. It makes a great display and there’s virtually no cost or kits to order, no plaques to make and no taxidermist bill to pay.
Once you’ve done one it takes no more than 10 minutes to cape a turkey out in the field and prepare it for transport. It takes about the same amount of time to prepare, stretch, and tack it down on a board, and borax the bird once the season is over and you pull it out of the freezer.
This “How to Cape a Turkey” write up along with the video that GSN has provided will make it easier for those who want to cape their birds.
Caping your turkey in the field
Handle the bird carefully once you’ve harvested him. Be careful not to damage feathers or the fan when carrying him back to camp. The better shape he’s in – the better cape you’ll have.
For easier caping clip the wings off.
Hang the bird by his head and neck. This can be done from limbs or even the side rail of your truck. (Note: This entire process is easier if there’s someone to hold the bird still while you cape. I’ve done numerous ones alone but not trying to cape a pinwheel helps.)
You will notice a distinguishable parting of feathers starting at the neck and extending down the side of the bird all the way to his fan. It’s similar to a human hair / part line. The key is to follow this line when cutting the cape off the bird. This is narrow on the neck and gets progressively wider as you get closer to the wing.
Make your first cut on the back of the bird’s neck where the feathers meet the hairless skin near the head and begin to follow the part line down the bird. Cut a few inches on each side to get started. Be careful to not pull feathers loose and as soon as the skin is exposed grip this instead to the outer part of the cape. This avoids pulling feathers loose that could affect the look of the finished cape. Once you get away from the head, slip your fingers tips in behind the skin and pull while you cut and follow the line. If in doubt where the line is go wider towards the clipped wing bone area. I usually make this cut all the way down to the bird’s leg and then do the same on the opposite side.
After the side cuts are complete, grip the cape from the inside and begin to pull and trim the cape away from the bird. Often the skin will separate similar to skinning a deer but be careful to not over do it. As you approach the mid back region the skin is very thin and you have to be careful not to cut thru the skin. You’ll understand this better once you’ve done one. Don’t worry if you have a couple “cut throughs” as it will likely not show up from the outside of the cape. After clearing the mid back the cape will pull loose for a couple inches and then you’ll have to trim again.
Once you trim the cape down to the fan area, finish the cuts on each side near the legs so that the entire cape is below the section at the fan. You’ll be able to grip the same place that you would normally just cut the fan loose and cut it free. The fan and cape should be in one piece and the caping is now complete.
To prepare for transport simply place a paper towel or toilet paper along the area against the exposed skin and fold it over. Place it in a bag and its ready for the freezer. If traveling its good to have an oversized “carry on” bag that you can pack the cape in. I have packed as many as 6 capes in a piece of luggage. If you’re on a travel hunt and a freezer isn’t available, spread the cape and borax it until its time to pack up and travel. (A word of advice here is that if you do borax the bird, try and finish the caping process sooner rather than later once you are home. I have had birds began to cure out while still in the freezer making it difficult to prepare and stretch compared to a bird that was not boraxed.)
The field aspect is now completed and once back home simply place it in the freezer until the season is over and you have time to finish the process.
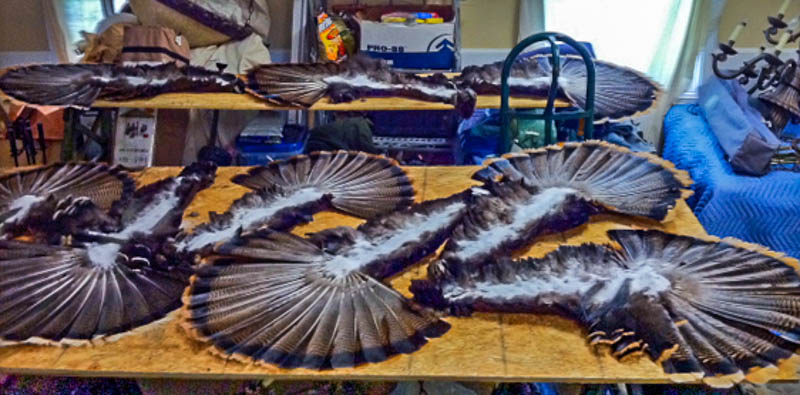
Turkey capes can be made into arrangements to maximize space
Preparing the Cape for Curing at Home
Tools Needed: Small snips or shears, knife, scissors, hammer, 4 d nails, 6 d nails, board or plywood strips, borax (Mule Team 20 20 can be found in most grocery stores)
Remove the bird from the freezer and allow to thaw. I lay mine out in the truck bed or driveway and within a couple hours they will unfold and I can begin the finishing process.
Flip the cape with feathers down and grasp group of feathers behind the main fan quills. Cut away with scissors. Press down on fan and hold knife flat and trim away meat where the main quills come together. Cut all meat away until all you see is the yellow near the quill tips. This is easy once you’ve done one and it can be done in one cut with experience. Cut both sides away and you’ll feel a small section of bone that protrudes up off quills. Use your snips and clip this away. Again press flat to quills and be careful where you cut.
Often when you cape you’ll have a couple secondary skin and feather sections that need to be cut away. Theses can be left but I prefer to get rid of them for the shape I like. By carefully holding them above the main cape you can clip these off with scissors. Now check the cape itself and careful cut away any meat that may be on the cape from the original field caping. Now the cape is ready to be stretched and prepared for curing.
Lay the cape on a board, strip of plywood, or sheet of plywood. (Its possible that heavy cardboard can be used as well but I like the stiffness wood provides.) Drive a 6 d nail through the middle of the fan where the quills come together (same area you cut the meat away and clipped the bone). Grasp the top of the neck section of the cape and pull tight and drive another 6 d nail to keep it in place.
Drive 3 sets of 4 d nails to open and stretch the cape itself beginning near the fan and working your way to the neck area. You won’t stretch to the point of putting pressure on the cape but just firmly open it up and tack it down. 3 sets spread out should be adequate to help the cape take the proper shape. (Note: Don’t over drive nails. Tack just enough to hold so that they’re easy to remove later)
Open the fan up so that’s it’s in alignment with the cape and adjust the fan to run straight across. It will permanently take the shape you give it so if it’s not all the way open or open too much that’s what you’ll end up with. Again, sight it so the base is straight across and tack a 4 d nail near the center quill area to hold in place. Adjust the feathers so that no openings between feathers are visible. Tack enough nails between feathers to be sure the spread will stay intact. I average using 6 nails to be safe.
Pour borax to cover all exposed areas of the cape. Pour generously on the fan. Take the beard from the bird and “plug” it into the poured borax and it will cure along with the cape and it keeps the right beard with the right cape.
Caping a turkey for display
Photo shows capes tacked down and curing
Store the cape in a safe area from children, pets, and weather. Let cure for 5 weeks and then simply remove by pulling nails with pliers. I dump most of the borax into a container and then carry outside and walk into the wind and tap with a bristle brush and lightly scape and brush the excess borax off. Be careful not to breathe it in and wearing a dust mask is advisable. I tap the cape from behind as well to clear as much as possible.
To mount the cape is easy. Lay feathers up, grasp the fan and determine approximate center of fan where quills meet. Drive a 6 or 8 d nail through the cape until the nail comes out the skin side. Hold the cape on the wall and tap the nail until it’s mounted on the wall. Avoid studs as just the drywall penetration will hold..
This is all it takes to skin and prepare a cape for mounting. Although several steps are involved from a time standpoint it only takes 20 minutes a cape for the combined aspects once you’ve done a couple.
Hopefully this piece along with the 2 videos will be helpful for those that would like to cape their birds.
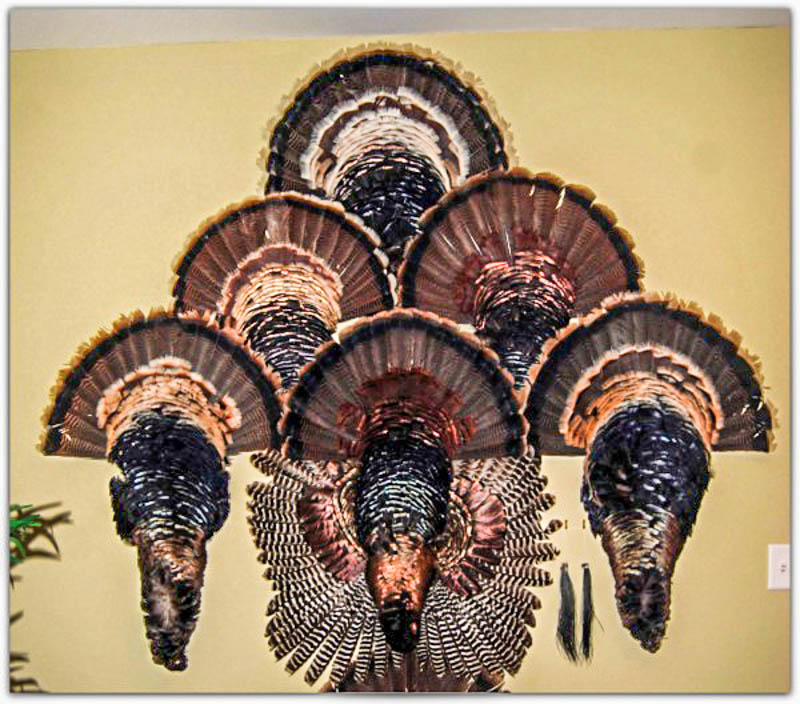
Photo shows a mix of Easterns, Merriams, and a Rio
Bobby Parks
Grand Slam Network
Ol Tom Field Expert
Mossy Oak Pro Staff
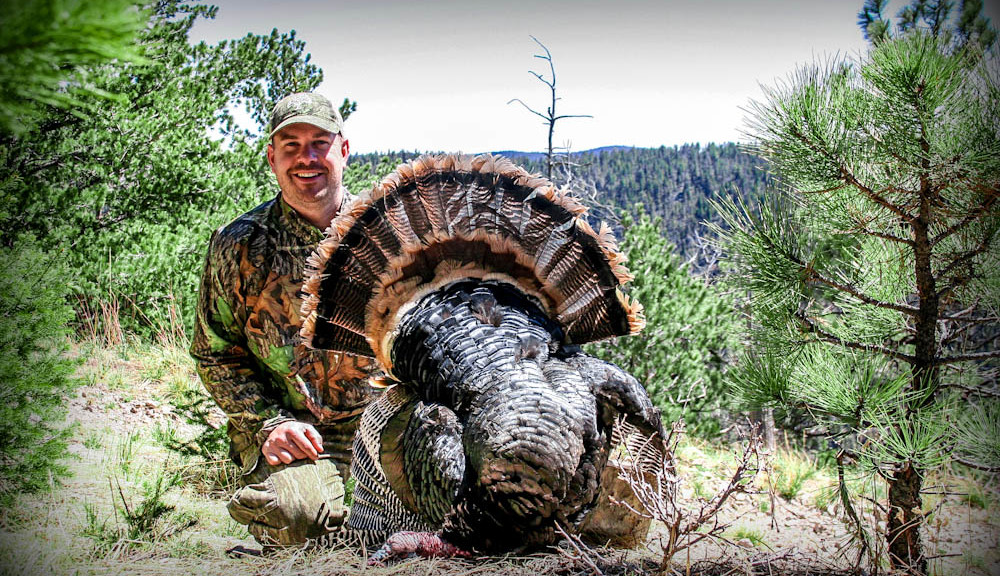
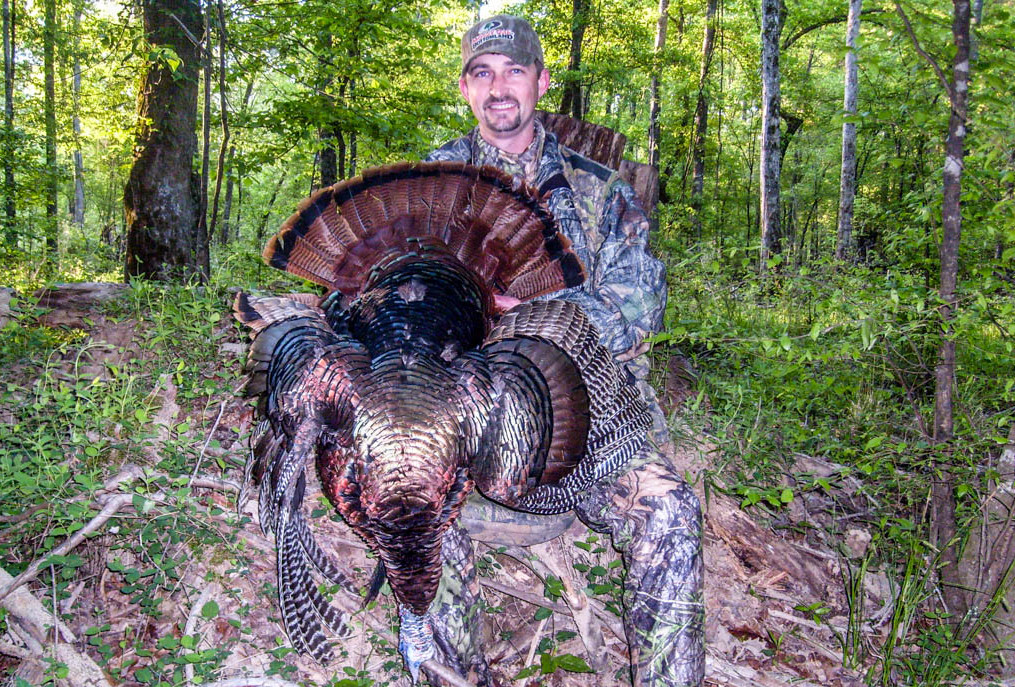
We spend countless hours and days preparing, driving, scouting, and hunting turkeys. But it’s interesting how once we’ve accomplished our mission how few of us take a few extra minutes to take care of our bird and put forth the effort to capture the moment with quality hunting photos.
After hunting all morning or all day and then killing a bird I’ll admit that often I’m tired and at the moment getting a good photo or finding a good place with a backdrop seems like too much trouble. Looking back I can tell you I’m always glad I did take the time especially when it involved family members and friends. One glance at the photo and the entire memory of the hunt comes back. I’d suggest to everyone reading this that its worth taking a few extra minutes and going through a little extra trouble each time you, a friend, or family member, harvest a turkey, and take quality photos.
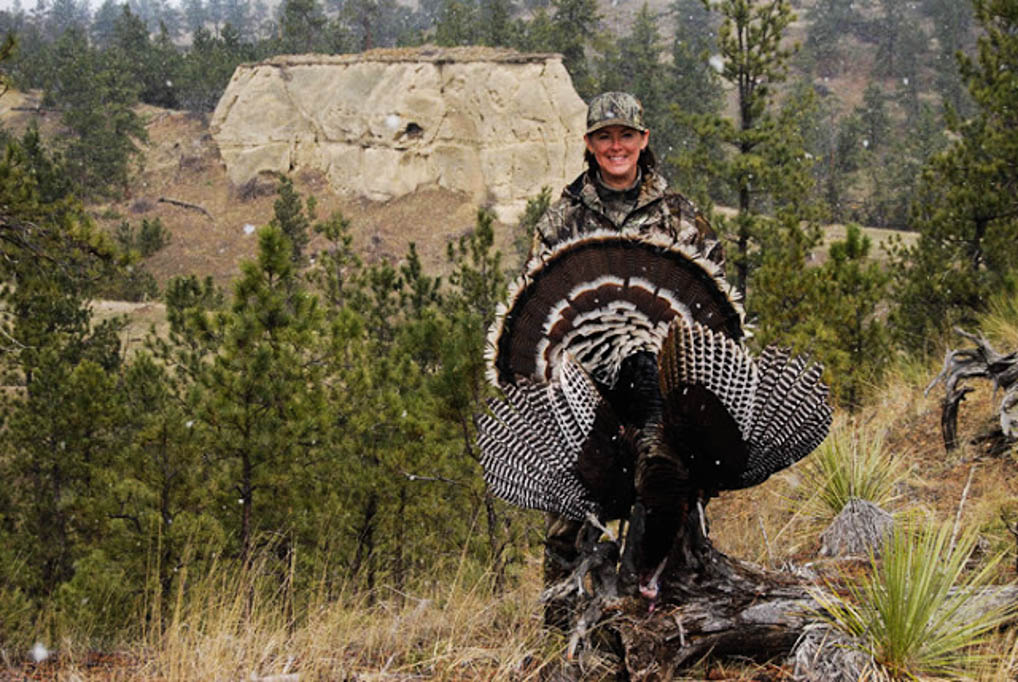
Photo shows my dad Lonnie Parks within 15’ of where his bird was taken in Montana
Bird Prep: To get good shots is simple but it starts from the moment you take the bird. For the bird to look good in any shots he has to be fluffed out. If I’m coming straight out of the woods I carry him over the shoulder so that his wings don’t stiffen tight to his body. On a long walk I may tuck him in my vest but I load him carefully and hang him upside down as soon as I get him back. This will allow his wings to be spread out for photos later. If I’m continuing to hunt I use a small piece of rope that I carry to hang the bird upside down from a tree and pick him up on the way out. Don’t just lay him down and don’t just pile him into the back of the truck where his fan will get damaged.
Backdrops: At a minimum you should always take the shot free of clutter. Little things like a camera bag or any odd items will stand out in a negative way in photos. Pay attention to what’s in the background and at least make sure its natural whether it is grass or brush. Avoid the pick up truck and carport or any location where man made objects clash with the photo. Don’t shoot into the sun and ideally use a flash to eliminate shadows. Don’t include a portion of someone else’s bird laying beside yours unless he or she is in it posing with the bird.
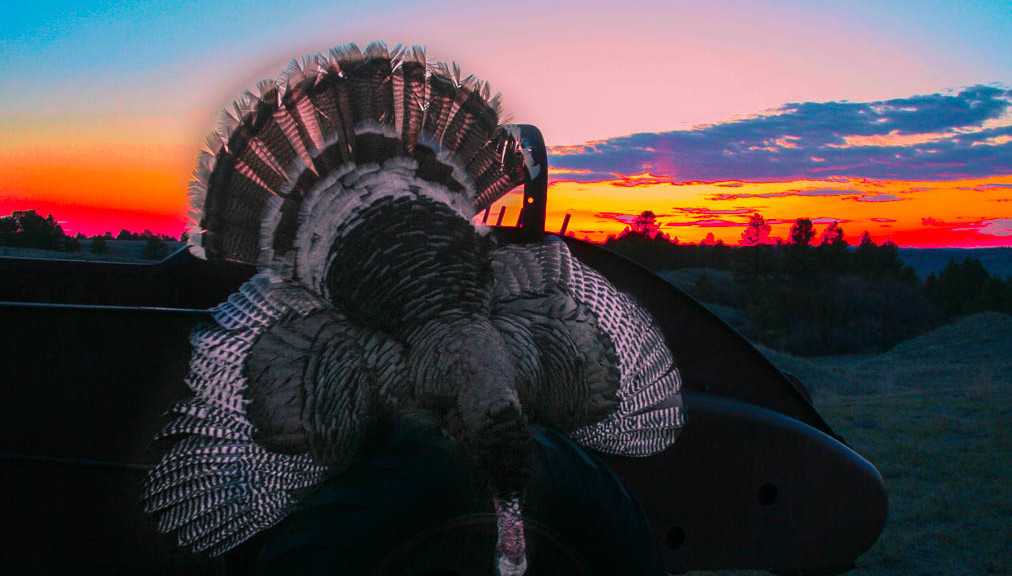
Scenic backdrops: I’m not going to say that there are scenic backdrops everywhere we hunt but there’s always a “good’ spot that stands out. Taking a few minutes to drive over and pose with the bird can pay off. Some of the best shots I’ve taken have been out west but there are plenty of places wherever I go. But again, at a minimum, take a moment to find a natural background and surface to photograph your bird.
Photo shows Mary with her first turkey on a snowy day
Positioning: One option is to just spread the wings and fan and pose behind the bird. Other options include looking for interesting set ups such as laying the bird over a log, rock formation, fence post, or old farm equipment. Elevating the bird on a piece of firewood may provide a better view. Frame the shot and take several photos both close and with some distance. Take some center and some with the person and bird off to the side.
I’ve seen some great shots from guys here on our forum where they are posing at the mouth of a cave or walking with the bird over their shoulders and across a creek. Some capture the amazing scenic views that come with hunting out west. Some capture the tough brushy Texas terrain and cactus. The bottom line is it takes little effort to get nice shots and it comes down to being creative and working with what you have.
I carry a tripod and often have to use the timer if I’m by myself. Ideally I shoot on the “RAW” setting with the camera on “auto” and then go back and use Photoshop to do the automatic edits. You can get really good shots this way. But even if you don’t do any of the special settings or edits, you can get great shots with today’s cameras. You just have to take a few minutes to do it after the hunt.
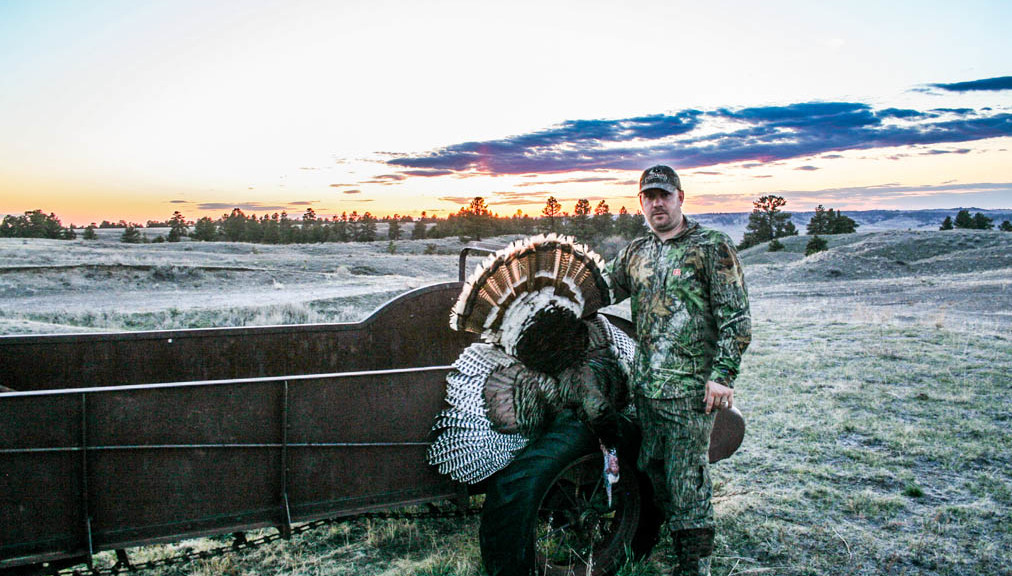
Photo captures a memorable hunt with friend Jim Bates in New Mexico
Think about it this way. If you’re getting up at 5:00 in the morning, spending the dollars and time to chase this bird, isn’t it worth a little effort to take the time to capture the end result of the few successful hunts we have each season in a quality way? I believe if you do the memory shared with family members and friends will be better preserved for all involved for the rest of your lives. Use these 4 tips for capturing quality hunting pics.
By Bobby Parks
Grand Slam Network
Ol Tom Field Expert
Mossy Oak Pro Staff
I would like to start off by saying that you are either going to love it, or you are going to hate it. You have to have the passion not only in front of the camera but behind the camera as well. Filming turkey hunts takes a lot of time and patience and there will be numerous times in the field where nothing seems to come together, yet there will be days when it does, just like chasing that ole tom around every spring. Sometimes we are rewarded but most times we fail, that goes hand in hand with filming your hunts. I am not saying that the footage you gather will not be lasting memories, it will, but we all strive to get that “kill” on video. You have to be willing to pass up shots because either you or your cameraman was not in the right position. If you have a hard time accepting this, filming may not be your thing. Don’t get discouraged and keep after them. Keep that footage and try and learn where your mistakes happened and improve in those areas. Let’s start off by talking about the equipment needed to begin filming your hunts.
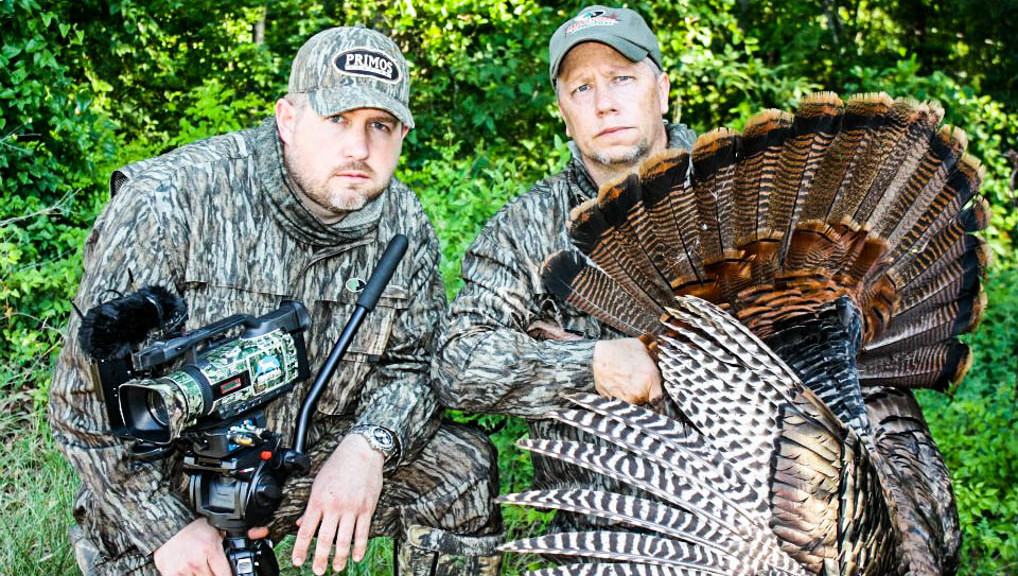
Roger Petty of Ronnie Smith Outdoors and friend Kevin Anderson
Cameras: There are several models out on the market that make fantastic videos. Choose a camera that fits your budget. Once you get into the filming and decide this is something you want to pursue, then you can upgrade and buy a better camera. Please remember, you get what you pay for. So if your objective is to get footage to share with your friends and family, I would go with a low-end camera. If the footage is to be used for TV shows, websites or for DVD’s, I would suggest going with a high-end camera. The quality of footage you are trying to achieve will be affected by the camera you choose.
Manual Focus: Whatever camera you choose, it needs to have a manual focus. As we all know so well, not every set-up is going to be ideal. By ideal, I mean nothing obstructing the view for the cameraman or the shooter. There are going to be instances where there are limbs, tall grass, branches, etc. in the way. This is where the manual focus comes in. Without it, your camera is going to be focusing on these objects in the foreground and not on the bird you are filming so a manual focus is a must. I always carry pruning shears to eliminate these situations when needed.
Low Light Settings: Another option to consider but not a necessity is low-light settings. This feature will allow you to film during low light conditions like can occur first thing in the morning when a bird flies off the roost and straight into your lap. Depending on the time this happens, you will want this feature in order to capture the footage; otherwise you will get “grainy” footage. While filming turkeys, this is not a feature I would worry too much about. Most of the time, your lighting will be just fine.
Size and weight of the camera is another option to consider. After a day in the field, that camera will get heavy. Personally, I prefer a smaller frame camera; it allows me to be portable and versatile. The maneuverability is much greater as well. It is just like toting a heavy or longer gun into the woods, after a while, it can become uncomfortable. So take that into consideration when choosing a size.
Shotgun Mics: Shotgun mics are an integral component for picking up quality sound such as gobbling and drumming. Cameras with remote mic ports allow you to use this option. Most cameras have decent audio built into them, but in order to pick up those ambient sounds, you will need a shotgun mic. I like to hear those leaves crunching, wings dragging, and gobbles rumbling when a bird is closing in on my set-up. A shotgun mic targets those dynamic sounds.
Wireless Mics: These mics are used for situations when your shooter is separated from the cameraman. It allows the cameraman to hear and pick up audio from the shooter without having to raise his voice or take a chance spooking game. The shooter can instruct the cameraman that a bird is in view allowing him to get the camera on the bird. A shotgun mic needs to still be used in conjunction with the wireless mic set-up. When using a shotgun mic, I would suggest getting a “wind sock” or “wind screen” to slip over the mic. This will reduce the wind noise if it is present.
Digital or Optical Zoom: You may encounter some cameras with digital zoom versus optical zoom. Optical zoom cameras are the ones I prefer. The larger the number, the further you can pick up images in the distance. Optical zoom uses the lens (optics) to bring the subject matter in closer whereas digital zoom enlarges a portion of the image. You may loose image quality with digital zoom cameras.
Tripod and Heads: When filming turkeys, I prefer using a tripod. Without the stabilization, your footage is going to be jerky and unstable. Choosing a good quality tripod will affect your footage along with a good quality fluid head. The smoother your panning’s are, the better images you will be able to capture. The fluid head is a must for smoother footage. I like a tripod that is quick and easy to set up as well. There will be situations where you got to get down and dirty in a hurry. The fumbling around with your equipment can cause you to bump that bird that is coming to your calling. Also, don’t be afraid about trying to conceal your tripod under some camouflage material or such….I have filmed wide-open for many of hunts and have yet busted birds. I am not saying that you can’t get busted, but just be slow with your movements.
Batteries: It is always good to have extra batteries with you at all times when you are in the field. Whenever I am filming, I leave my camera on at all times. I do this because you never know when that bird is going to step out. Since the camera is constantly on, batteries tend to die especially on those colder mornings. A little trick I use on those colder days is to keep my extra batteries in a “coozie” along with hand warmers. This trick usually extends the life of my batteries. You never know when your battery is going to die and you will need that extra one.
Protection: When I say protection, I am referring to camera protection from elements. You never now when you are going to get caught out in the rain while filming. I always carry a grocery bag in my vest to cover my camera during these situations. To be honest, I try to avoid filming when the weather is crappy. Cameras are too expensive. You take a risk in ruining them if you elect to try. There are camera rain covers available through different camera companies and they allow you to film in these conditions, they just cost more than a grocery bag.
Tapes: Be sure to use the same type of tapes in your camera. It is not good practice to change brands. This will cause the heads in your camera to malfunction. I do suggest if you have to change for emergency purposes, always clean the heads. Keep a head-cleaner tape with you at all times. Not necessarily in your vest, but with your camera equipment. Always label your tapes after the hunt. If you don’t, you will be constantly trying to figure it out and it is not good practice to view your footage through your camera.
Camo Your Equipment: Anything that shines or sparkles needs to have camo on it. You know as well as I do about the vision a turkey has. I put camo on my tripod and on my camera. This helps eliminate getting busted while filming. It is not a 100% solution, but it does help.
The Set-up: This can make or break your footage. Set-ups are an important key to your success for acquiring footage as it is for giving that bird a dirt-nap. I try to set up in open terrain, not necessarily wide open but in spots where I think I can get the best footage possible. It is difficult to get good footage if you are set up in thick brush or cover. After you find a spot, give a quick glance around to make sure nothing will hinder your movements with the camera. If there is, take care of it right away. Sometimes you will just have to go with what you got, when you have to hunker down quickly.
Ground blinds are much easier to film out of than being in the open and the turkeys don’t seem to mind where you place them. They allow you to make quick movements within the blind without blowing your cover.
Actual Filming: When filming your hunts, you want your footage to tell a story of that particular hunt. Whenever I get set up, I film the scenery around me by panning from right to left. I film everything because in the end, you can edit out what you don’t like but if you don’t have the footage, you can’t add it. Film the sunrises, the other creatures that are out and about, as well as your shooter walking in to your set up itself……film it all. By doing this, not only will you have the footage but it will give you practice with your camera. All of this footage is what we refer to as B-roll footage and it will help tell your story.
Be Prepared: I try to visualize the shot before it happens and practice moving the camera around to make sure nothing is in my way. I try to anticipate where the bird may come from and be prepared to video those areas without obstructions. I like to set up over the shoulder of my shooter so when the bird walks out, I can capture the whole image in one frame. It allows me to focus in on the bird leaving my shooter somewhat out of focus. This also eliminates having to go back and do cutaways of your shooter getting his gun up and flipping the safety off. If you are filming out of a blind, you can film the shooter doing all of this as well before the shot is actually taken.
One very important part to remember is to take your hands off of the camera when the shot is taken. By the reaction of the shot, you are going to jump a little and you don’t want that in your footage. You want to be focused in on that bird and jumping may cause you to shift off of the bird missing the “kill” shot. To give you a scenario of what I try to capture on a hunt goes like this: Press RECORD, get the shooter seeing the bird or pointing to the bird, zoom in on the bird, come back to the hunter if you are not over his shoulder, follow the bird in, then get tight on the bird before the kill. Go back to the shooter to get his reaction after the kill. Remember to use smooth motion when panning back and forth. Film your shooter walking up to the bird, give a quick interview of how the hunt played out, and show off the fan, beard, and spurs if you like. I like to keep the conclusion of story short and simple. After all of this, I like to film the shooter walking away with the bird over his shoulder.
Like I said, if you forget any of this, you can go back and do your cutaways of the hunter; however it is sometimes tough trying to re-create the excitement of the shooter. It is very important to keep the bird in the center of your frame and stay in focus, especially if the bird goes behind brush or trees. You will actually lead him while he is walking into your set-up. Try not to zoom in and out repetitively and keep your zooming smooth. Here are a few things that I try to avoid in my footage. No cursing, no chewing tobacco (which I am guilty of), no spitting and no alcoholic beverages being consumed. Clean kills are your priorities so if the shot doesn’t present itself, don’t shoot.
I would highly recommend getting someone to help you film. It is hard to get good quality footage doing it alone. Your footage will never be as good by yourself as opposed to someone else filming it for you.
And most importantly, always remember to press “RECORD”.
In this turkey calling tips video with David Halloran, he covers the following pot call tips that will help you call in more turkey this spring:
How to hold a pot call. Make sure you don’t grip the call too tight.
Demonstration on how to cut with a pot call
How to kee kee on a pot friction call by griping the striker tight and using the outer edge of the call surface
How to purr and cluck on a pot call by letting the striker skip across the surface
The Crystal Mistress’ sister has arrived – the Twisted Sister. She’s a raspy yelping, sharp cutting call that is sure to bring tom in on a rope. The laminate pot combines the stability of thermal treated poplar with the tonal quality of yellow heart. When matched with the crystal striking surface over a slate soundboard, this call becomes a devastating tool in the turkey woods. Each call comes with a dymondwood striker and a purple heart striker.
While in Nashville at the NWTF convention, the Grand Slam Network met up with Sadler McGraw to run through some turkey calling tips on a pot call. Hopefully the video will help you improve your turkey calling in the woods this spring! In the video, Sadler goes over his hand placement, cutting, and yelping on a pot call.