With the popularity of cameras and camera phones these days, it seems we are looking at or taking snapshots on a daily basis. I believe, armed with a few wildlife photography basics, we can go from snapshot to photograph. In my world a “snapshot“ is a picture that impacts the folks associated with it, where a photograph appeals to most everyone who views it. The biggest thing that differentiates the two is composition.
As with any of the arts, whether musical arts, language arts, or the visual arts there needs to be a flow or rhythm. Deciding how to direct the viewer’s eye through the frame is your job for composition. You can have a poorly executed photo, with good composition, and it can be enjoyed by many. Whereas a perfectly exposed photo with poor composition, will be quickly looked over.
In photography, you can’t discuss composition without touching on The Rule of Thirds, The idea is not a new one. Painters have used this concept for hundreds of years. Basically, if you come in from the edges of your picture one third of the way and place a line, you will make a “Tic Tack Toe“ grid. Where the grid lines cross are considered Power Points. Placing your subject on one of these lines, and even better on a power point will give your photo more punch. The intent is to get the subject out of the center of the frame. Keeping things in the center will create a static type photo. With wildlife we can carry the idea a step further using vectors.
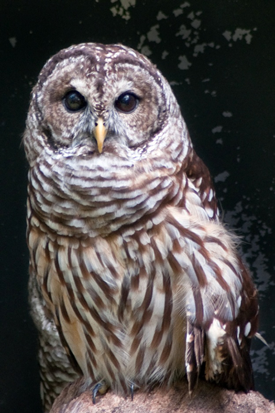
Vectors refer to implied directions. Is the subject moving or looking in a certain direction? If so, we want them to be moving into, or looking into the frame. If our animal is looking to the left, His eye should be on the right side third’s line. If we were to place the eye on the left side, the animal would be looking out of the frame, and the viewer would naturally follow the vector right off the page. That is not our goal, we want the viewer to gaze as long as possible.
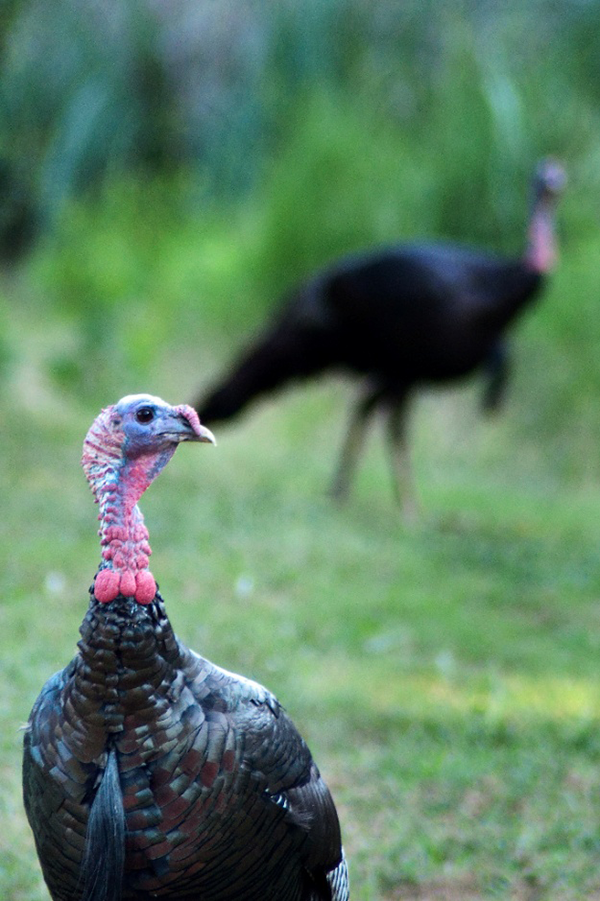
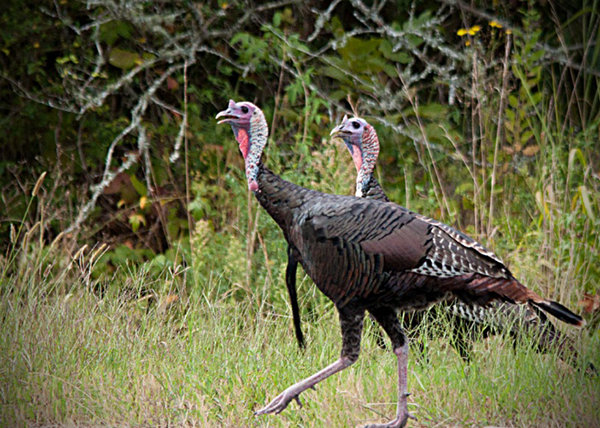
There will be times when we will have more than one subject in the photo. In these cases we need to think about balance. As the viewer of a photograph, we subconsciously place visual weight on each element in the frame. For instance, when photographing two subjects (hunter and game) they need to be placed as to balance each other. Not necessarily side by side, but in harmony, and not all on one side.
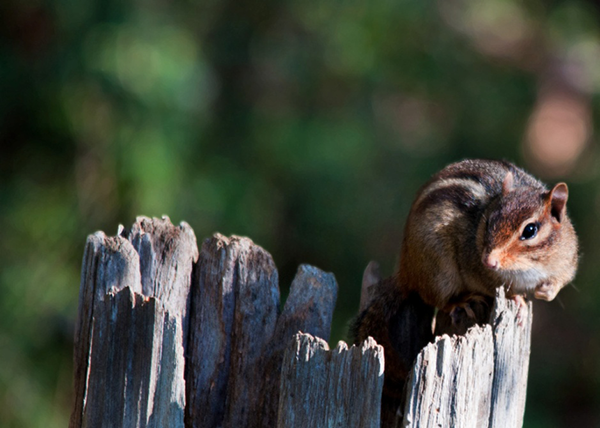
Using a camera and not a phone there is an additional tool used to direct the viewer’s eye to the subject called selective focus. This is where you can make use of the aperture, to create a pleasingly blurred background. We automatically look to things in focus. With the background blurred; the viewer’s eye will go straight to the in focus subject. To achieve this simply set the camera’s f/stop to its smallest number and keep some open space behind your subject. This means you have to get the camera out of “Auto“ mode.
Getting out of auto is not as hard as it may seem. I suggest to start off in Av (For Cannon) or (A) for Nikon. This mode allows you to choose the f/stop, and the camera will calculate the shutter speed. I find this best in rapidly changing light, like at sun rise or set. In this mode you only need to decide if you wish for a blurred background (small f/ number) – it doesn’t matter background (f/8 plus or minus a stop or two) or a background that is sharp (f/12 on up). When photographing subjects like birds (turkeys, ducks, etc.) I always use full manual. This allows me to choose the highest shutter speed as possible. A fast shutter of around 1/1000 of a second or more will freeze motion a renders better fine feather detail.
If you are using a DSLR, you will need to decide on what file format to save your captures in. My choice is RAW. You may choose jpeg or even both. I like to be in charge of how my art is processed, thus I use RAW. With JPEG the camera decides contrast, saturation, white balance ETC. With RAW you make the photo your art. It is my opinion that every digital photograph will need some optimization. Some type of photofinishing software will be needed. There are several good free software programs on the web. One popular today is Gimp. My choice though, is Photoshop.
In Summary
- With any live creatures, the focus needs to be on the eye.
- Use the Rule of Thirds to get the subject out of the center of the frame.
- Be sure the subject is looking or moving into the frame, so the viewer’s eye doesn’t move off the page.
- Level the horizon line, a mistake made by some advanced photographers too often.
- When you focus on your subject, but before you trip the shutter. Look around the viewfinder for anything out of place. Elements like trees growing out of heads, phone poles and power lines all can usually be removed by a step to one side or the other.
- Get out of AUTO; learn how the Exposure trio relates to each other.
- Use selective focus to your advantage. A pleasingly blurred back ground will make your subject pop.
- When photographing Birds, use the fastest shutter speed possible to freeze motion and achieve better fine feather detail.
- Get photo editing soft ware to optimize your photographs.
- Search out a way to receive good honest critique on your work.
All photographs are property of Clyde C Hopper.